Distribution of Microsoft Windows 7
Windows 7 is one of the latest versions of Microsoft Windows operating system family for PCs. It is distributed in four editions Starter, Home Premium, Professional and Ultimate. Home Premium, Professional and Ultimate editions are sold with new computers and in computer shops, but Starter edition is distributed only with new computers called netbooks. The standard distribution medium for Windows 7 is DVD.
Create bootable USB flash disk with Windows 7 installation
Windows 7 can be also installed from bootable USB flash disk. To create it, you will need flash disk with minimum of 4GB capacity and of course Windows 7 installation DVD. You can find some utilities on Internet that can create bootable USB flash disk, but these instructions can help you to create it, only with applications distributed with Microsoft Windows.
- Connect the flash drive to USB port.
- Open the Start menu, type "cmd" to search box and press ctrl+shift+enter.
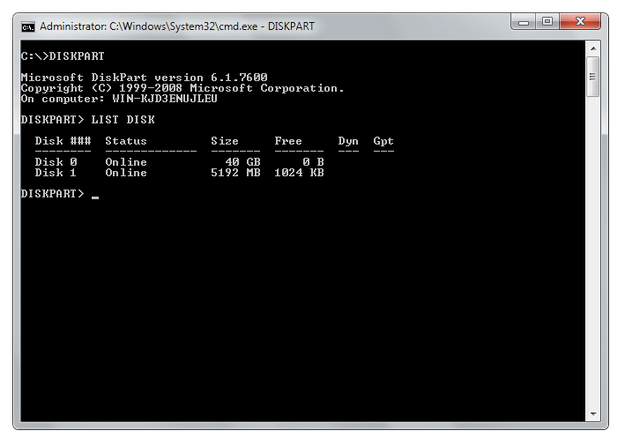
- Type DISKPART to command line to run Microsoft DiskPart utility
- Type LIST DISK to view the list of disks connected to computer
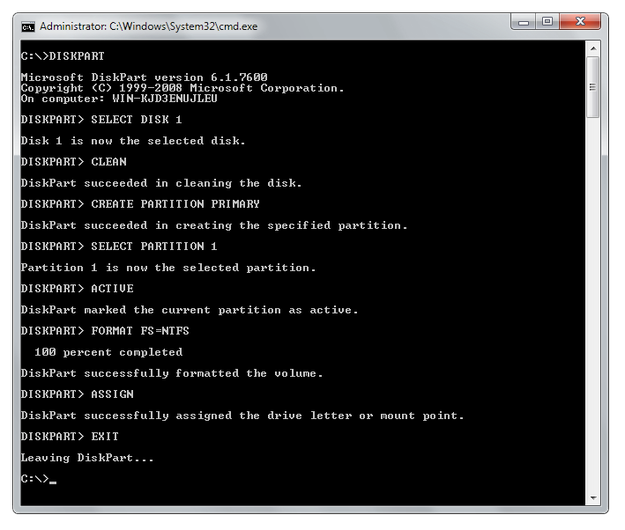
- Type commands sequence:
SELECT DISK # (# is number of the USB flash disk in the list of disks)
CLEAN (remove partitions from the USB disk)
CREATE PARTITION PRIMARY (create new primary partition)
SELECT PARTITION 1 (select the new created partition)
ACTIVE (set new partition to active)
FORMAT FS=NTFS (format of the partition with the NTFS file system)
ASSIGN (give flash disk drive letter in Windows)
EXIT (quit from the Microsoft DiskPart)
- Stay in the Command line and go to the Windows 7 installation DVD by typing the letter of the DVD drive (for example type D:)
- Go to the BOOT folder by typing CD BOOT command
- Type BOOTSECT.EXE /NT60 #: (# is the letter of the prepared bootable USB flash disk)
_1.png)
- Copy the content of the Windows installation DVD to your USB flash disk
After these steps, the Windows bootable installation flash disk will be created. To boot from it, make sure, that USB port is set as the the first option in the boot sequence settings in the BIOS of the computer. These instructions will also work in Windows Vista.
You can also download the Windows 7 USB/DVD Download Tool from Microsoft website, which can be used for the same purpose.

