Guide: Making screenshots on old Android devices
"Take a screenshot" is not a standard feature in devices with Android operating system. However some manufacturers, such as Samsung, have this option implemented in their products. Other option is to root the phone.
But there is also a third option, for those who do not want to root their device, or do not own smartphone with this feature natively enabled.
To take screenshots from your phone, you will need a computer with Windows, Mac OS X or Linux operating system with JAVA SE Development Kit and Google Android SDK Tools installed and USB cable.
How to add screenshoting function to legacy Android devices
Step 1 - Download and Install JAVA SE Development Kit
JAVA SE Development Kit is a development environment for building applications, applets, and components using the Java programming language. It is available to free download on Oracle website. Same components of JAVA SE Development Kit will be needed to run Android SDK.
Step 2 - Download and Install Google Android SDK
Google Android SDK is a set of tools and packages used to create Android applications. It contains debugger, libraries, a phone emulator, documentation, sample codes, helps and ADT plug-in for Eclipse that is official integrated development environment for Android. Android SDK installation package can be downloaded from Android developer website.
Step 3 - Run Android SDK Manager
When the installation of Android SDK is finished, run the Android SDK Manager. The program is able to install, delete and manage Android developer packages, utilities and system drivers.
In Tools folder check the Android SDK Platform-tools box and in Extras the Google USB Driver package and press the Install X packages button to install them.
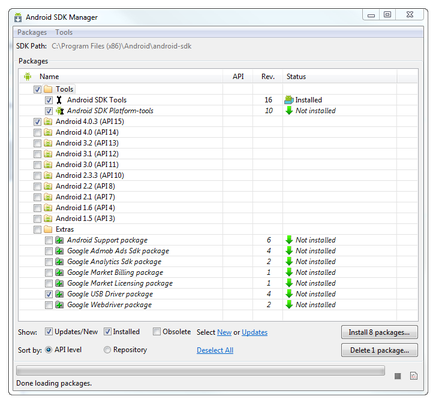
Android SDK Manager main window
If you want to try application development, or Android emulator you can install any other package Android API package.
Step 4 - Phone settings
In your Android, open Settings → Application settings → Development → and check USB debugging mode to on and after that connect the device with USB cable to the computer. Without debugging enabled, the utility used in next step would not work.
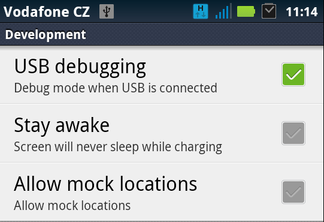
Android Development options
Step 5 - Take a screenshot
Back on your computer, run Dalvik Debug Monitor utility from Android SDK Tools. By default The batch file is located in this folder - C:\Program Files (x86)\Android\android-sdk\tools\ddms.bat.
If the phone is connected properly it will be shown as online.
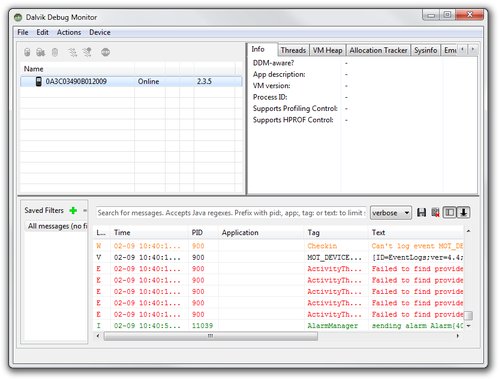
Dalvik Debug Monitor main window
Click on Device in the program menu and use Screen capture... option (or Ctrl +S), which will open a window with your android screen ready to capture.
Now take your phone and navigate to the screen you want to capture and click on the Refresh button in the Device Screen Capture window on your computer to load the actual screen of your Android phone.
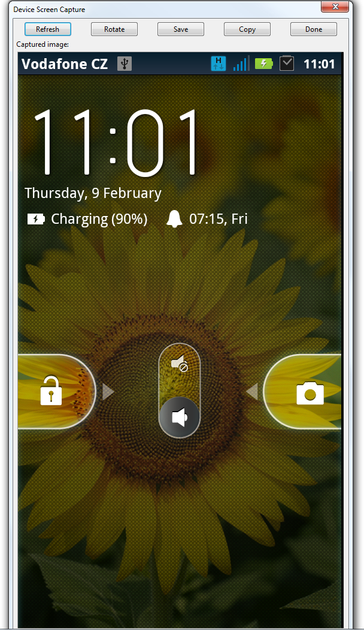
Device Screen Capture window
Now just click the Save button which will create the screenshot of your Android device in Portable Network Graphics format (PNG file extension). And that's it.

