
 Language
Related extensions:
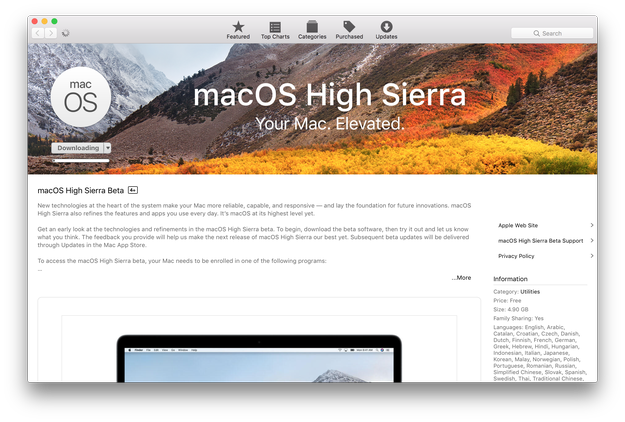
Try out a beta version of the upcoming macOS High Sierra!
macOS High Sierra 10.13 (available as beta since June 5, 2017) is an update available through the App Store. Much like in the case of previous updates, your user data as well as system settings will be preserved when you update your OS.
Nevertheless, many users might prefer to make a clean installation of macOS High Sierra and for this you will need to create a bootable installation USB drive and we will show you several ways how you can achieve this.
Macs compatible with macOS High Sierra
- Mac: late 2009 or newer
- MacBook/MacBook (Retina): late 2009 or newer
- MacBook Pro: mid-2010 or newer
- MacBook Air: late 2010 or newer
- Mac Mini: mid-2010 or newer
- Mac Pro: mid-2010 or newer
macOS High Sierra is now available in App Store only for registered beta testers. The public version will be available this fall.
How to create macOS Sierra USB installation flash drive
- Create installation USB flash drive with createinstallmedia tool
- Create installation USB flash drive with Disk Utility and Finder
First step - Get macOS High Sierra installation app and prepare USB flash drive
Download macOS High Sierra installer (Install macOS High Sierra.app in Applications folder) from Mac App Store.
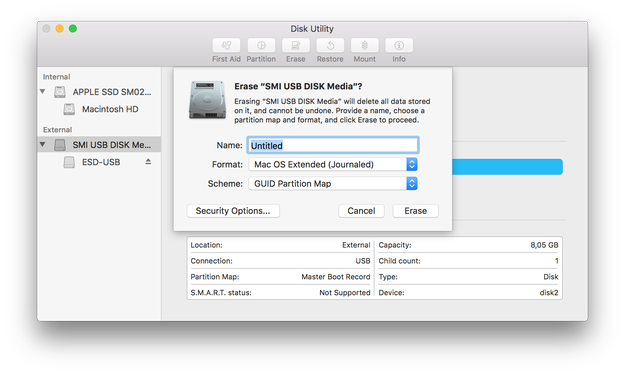
Prepare a USB flash drive with the Apple Disk Utility. If you did not already, you will have to format the USB drive with GUID Partition Table scheme selected and name it as Untitled. The minimal capacity of USB drive must be of at least 8 GB.
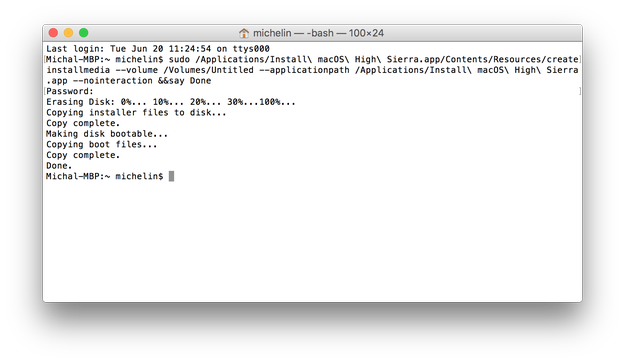
Create macOS Sierra installation USB flash drive with createinstallmedia tool
The createinstallmedia is a command line tool, which allows users to simply create installation drive, distributed with macOS High Sierra installer.
After you have prepared your USB flash drive and downloaded the macOS High Sierra Installer from the App Store, open the Terminal and type command:
sudo /Applications/Install\ macOS\ High\ Sierra.app/Contents/Resources/createinstallmedia --volume /Volumes/Untitled --applicationpath /Applications/Install\ macOS\ High\ Sierra.app --nointeraction &&say Done
In our case "Untitled" is the name of USB flash drive! Replace "Untitled" by name of your flash drive.
Wait a few minutes until your macOS High Sierra installation USB drive will be ready.
To install macOS High Sierra ► restart computer ► hold the Option (ALT) key and select Installation USB drive from the menu.
Create macOS High Sierra installation USB flash drive with Disk Utility and Finder
After you have prepared your USB flash drive and downloaded the macOS High Sierra Installer from the App Store, open the Terminal and type command:
defaults write com.apple.finder AppleShowAllFiles 1 && killall Finder
This command allows you to view hidden files in Finder.
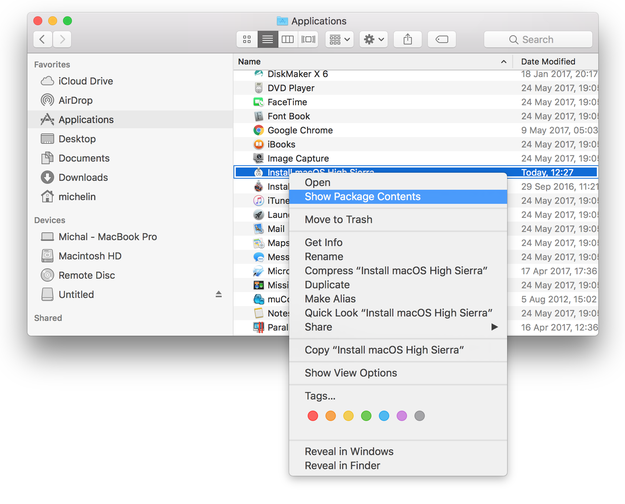
Now Open Finder ► Applications ► Install macOS High Sierra.app ► right click ► Select Show Package Contents option.
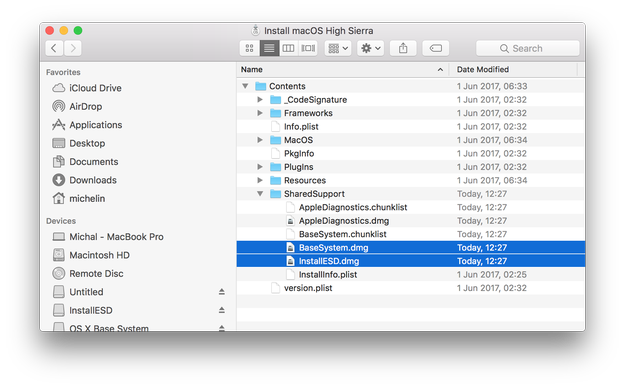
Navigate to Contents/SharedSupport ► Mount InstallESD.dmg file and BaseSystem.dmg file
Connect USB drive and open Disk Utility (/Applications/Utilities)
Select the USB drive from the list of disks, click on Restore icon and use OS X Base System option as a source. When ready click on Restore button.

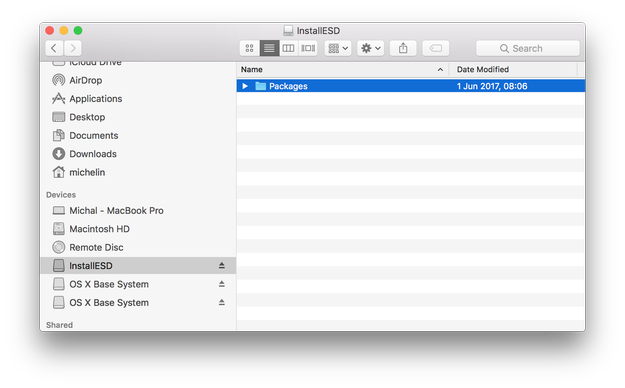
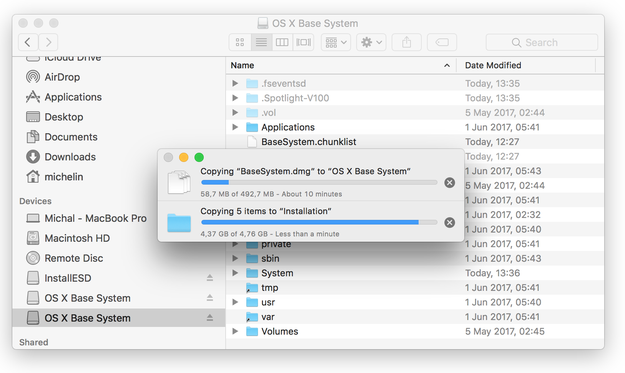
Open InstallESD volume in Finder, select Packages folder and copy them to System/Installation folder on USB drive (OS X Base System).
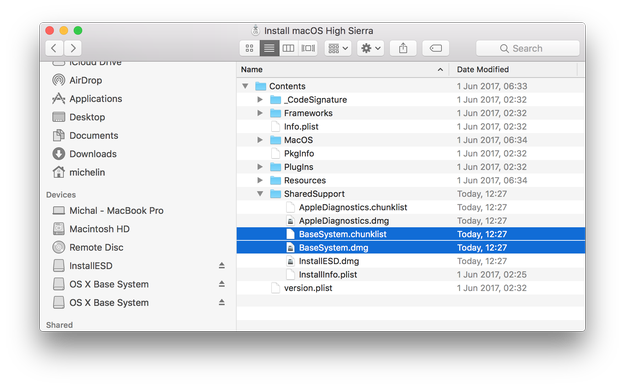
You will also have to copy BaseSystem.chunklist and BaseSystem.dmg files from Install macOS High Sierra.app package to root of USB flash drive (OS X Base System).
And that's it. Your macOS High Sierra installation USB drive is ready for use.
To install macOS High Sierra ► restart computer ► hold the Option (ALT) key and select Installation USB drive from the menu.