
 Language
Related extensions:
Install clean macOS Sierra from USB
macOS Sierra 10.12 (previously known as OS X) was released in September 2016 as an update available through the App Store. You do not need to worry, much like in the case of previous updates, your user data as well as system settings and installed applications will be preserver when you update your OS.
However, some users might prefer to mae a clean installation of macOS Sierra and for that you will need to create a bootable installation USB drive. This article covers several ways how you can achieve this.
Four ways how to create macOS Sierra USB installation flash drive
- Create installation USB flash drive with createinstallmedia tool
- Create installation USB flash drive with Terminal
- Create installation USB flash drive with Disk Utility and Finder
- Create installation USB flash drive with DiskMaker X
First step - Get OS X Sierra installation app and prepare USB flash drive
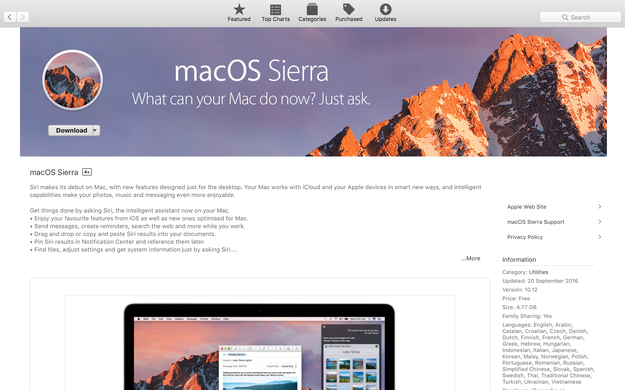
Download macOS Sierra installer (Install macOS Sierra.app in Applications folder) from Mac App Store.
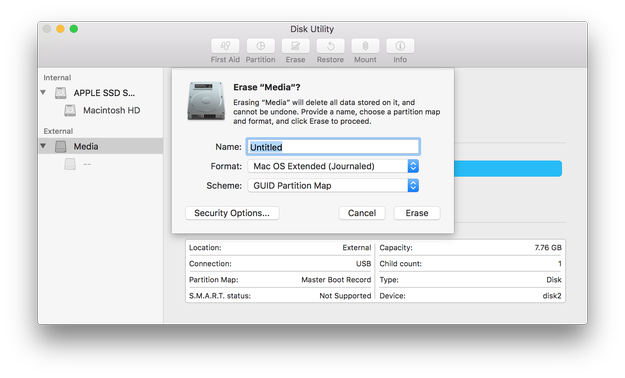
Prepare a USB flash drive with the Apple Disk Utility. If you did not already, you will have to format the USB drive with GUID Partition Table scheme selected and name it as Untitled. The minimal capacity of USB drive must be of at least 8 GB.
How to create macOS Sierra installation USB flash drive with createinstallmedia tool
The createinstallmedia is a command line tool, which allows users to simply create installation drive, distributed with macOS Sierra installer.
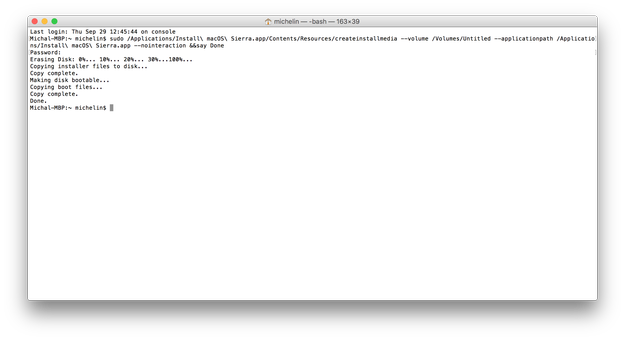
When you have prepared your USB flash drive and the macOS Sierra Installer is downloaded from the App Store ► open Terminal and type command:
sudo /Applications/Install\ macOS\ Sierra.app/Contents/Resources/createinstallmedia --volume /Volumes/Untitled --applicationpath /Applications/Install\ macOS\ Sierra.app --nointeraction &&say Done
In our case "Untitled" is the name of USB flash drive! Replace "Untitled" by name of your flash drive.
Wait a few minutes until your macOS Sierra installation USB drive is ready.
To install macOS Sierra ► restart computer ► hold the Option key and select Installation USB drive from the menu.
How to create macOS Sierra installation USB flash drive with Terminal
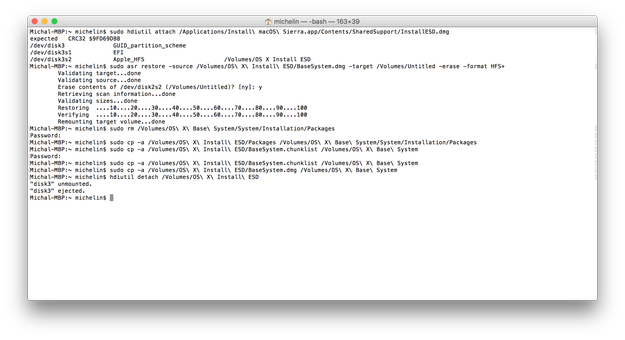
When your USB flash drive is ready and macOS Sierra installer downloaded from the App Store ► Open Terminal and type the following sequence of commands:
sudo hdiutil attach /Applications/Install\ macOS\ Sierra.app/Contents/SharedSupport/InstallESD.dmg
sudo asr restore -source /Volumes/OS\ X\ Install\ ESD/BaseSystem.dmg -target /Volumes/Untitled -erase -format HFS+
sudo rm /Volumes/OS\ X\ Base\ System/System/Installation/Packages
sudo cp -a /Volumes/OS\ X\ Install\ ESD/Packages /Volumes/OS\ X\ Base\ System/System/Installation/Packages
sudo cp -a /Volumes/OS\ X\ Install\ ESD/BaseSystem.chunklist /Volumes/OS\ X\ Base\ System
sudo cp -a /Volumes/OS\ X\ Install\ ESD/BaseSystem.chunklist /Volumes/OS\ X\ Base\ System
sudo cp -a /Volumes/OS\ X\ Install\ ESD/BaseSystem.dmg /Volumes/OS\ X\ Base\ System
hdiutil detach /Volumes/OS\ X\ Install\ ESD
Now wait until your bootable installation flash drive with macOS 10.12 Sierra is made.
To install macOS Sierra ► restart computer ► hold the Option key and select Installation USB drive from the menu.
How to create macOS Sierra installation USB flash drive with Disk Utility and Finder
When your USB flash drive is ready and macOS Sierra installer downloaded from the App Store ► Open Terminal and type:
defaults write com.apple.finder AppleShowAllFiles 1 && killall Finder
This command allows you to view hidden files in Finder.
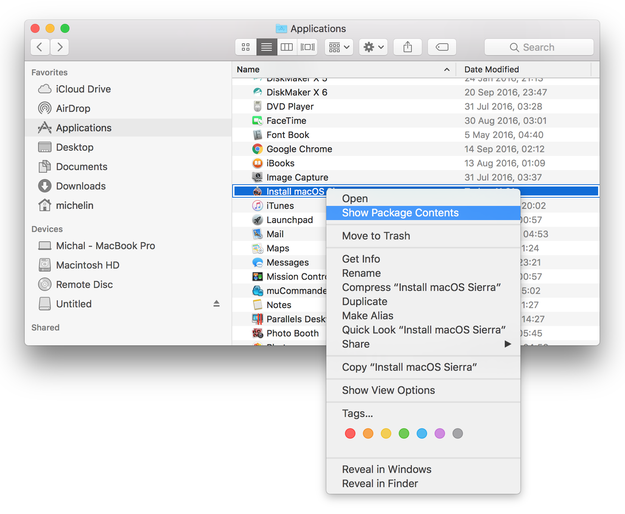
Now Open Finder ► Applications ► Install macOS Sierra.app ► right click ► Select Show Package Contents option.
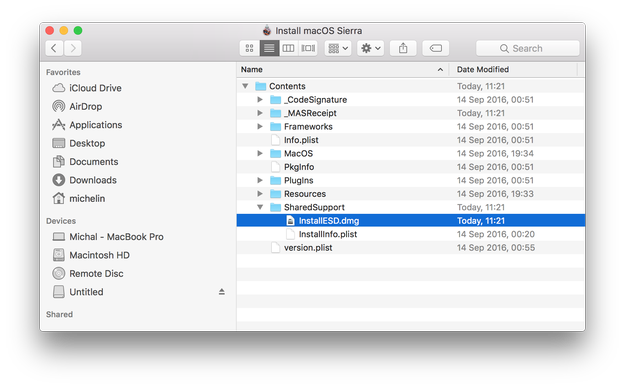
Navigate to Contents/SharedSupport ► Mount InstallESD.dmg file
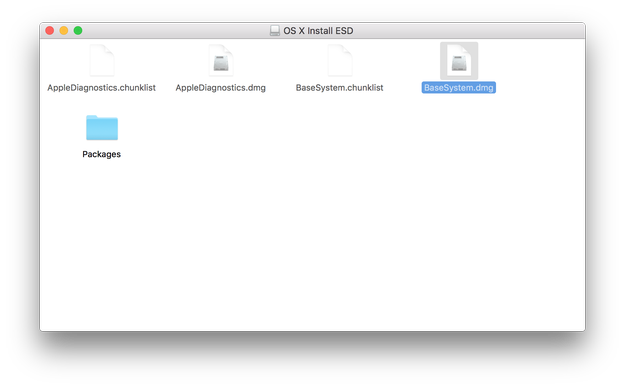
Open OS X (even thought the system it's caled macOS now) Install ESD archive in Finder and mount BaseSystem.dmg archive
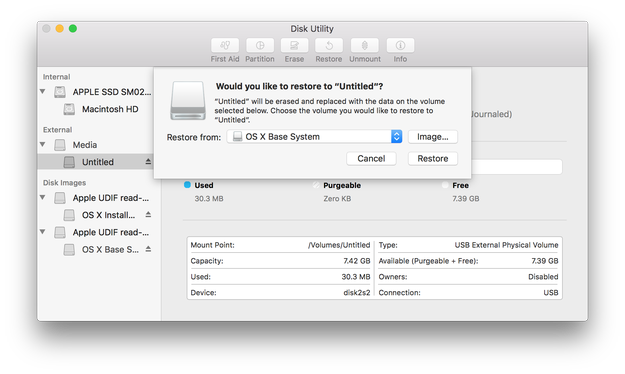
Connect USB drive and open Disk Utility (/Applications/Utilities)
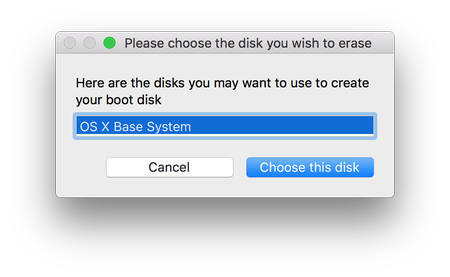
Select the USB drive from the list of disks, click on Restore icon and use OS X Base System option as a source. When ready click on Restore button.
After the Restore process is finished, open Finder ► open USB drive (OS X Base System) ► go to the System/Installation folder and select Packages file and delete it.

Open OS X Install ESD volume in Finder, select Packages folder and copy them to System/Installation folder on USB drive.
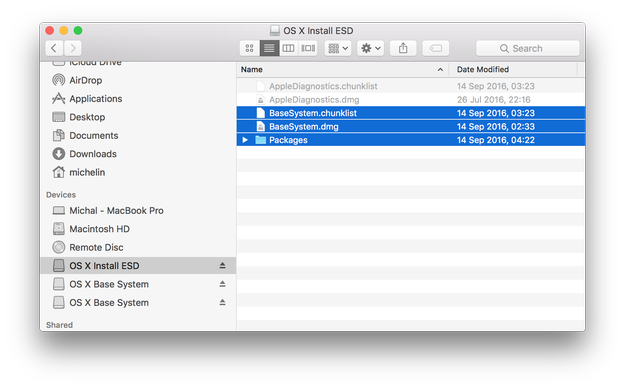
Also copy BaseSystem.chunklist and BaseSystem.dmg files from InstallESD.dmg volume to root of USB flash drive (OS X Base System).
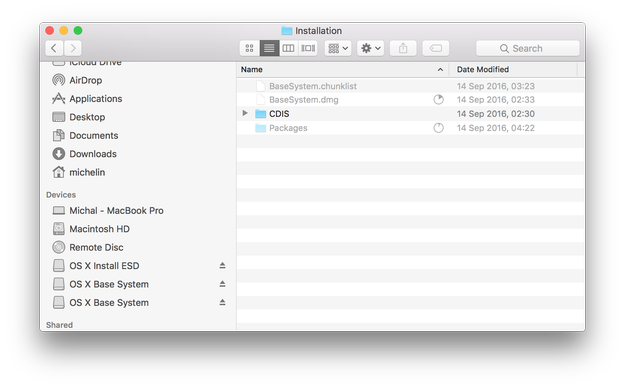
Now your macOS Sierra installation USB drive is prepared and ready for use.
To install macOS Sierra ► restart computer ► hold the Option key and select Installation USB drive from the menu.
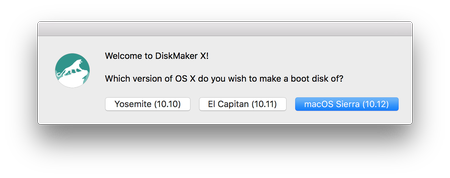
How to create macOS Sierra installation USB flash drive with DiskMaker X
DiskMaker X tool is Wizard like tool that allows you create macOS installation disk. Download DiskMaker X to your Mac and copy it to Applications folder.
When you have prepared your USB flash drive and macOS Sierra installer is downloaded from App Store ► open DiskMaker X.
Select version of macOS (in our case macOS Sierra).
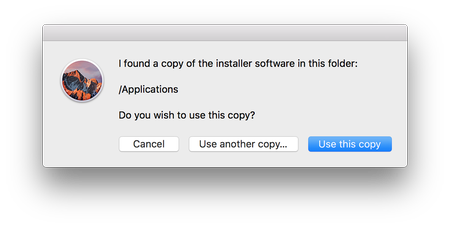
Select copy of macOS installation app.
Select USB drive that will be used for USB installation.
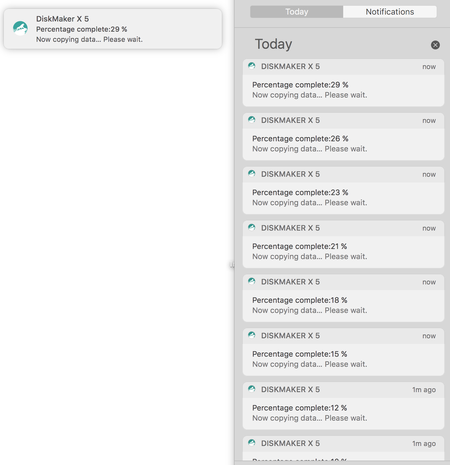
And wait a few minutes till the the DiskMaker X finish creating process. Information about progress are viewable in Notification center.
To install macOS Sierra ► restart computer ► hold the Option key and select Installation USB drive from the menu.