
 Language
Related extensions:
Windows 8 lock screen
Microsoft Windows 8 Modern UI (also known as Metro UI) brings some features from Windows Phone to the desktop computers. One of these is a new Lock Screen that is visible after a few minutes of user's inactivity. It visualizes information about time, date, connectivity, battery status and information from Metro applications.
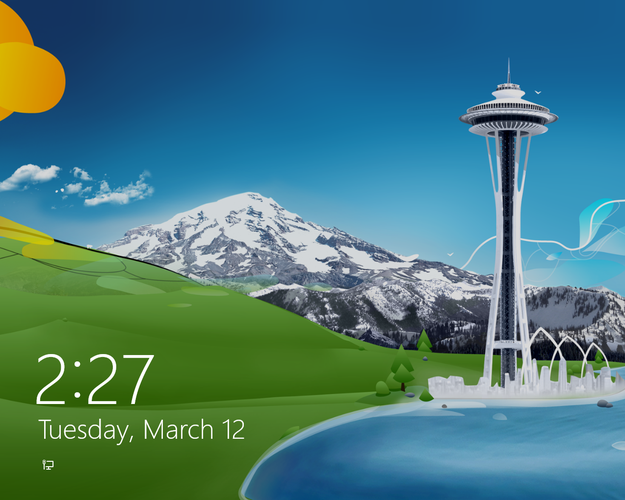
Windows 8 default lock screen
Whilst the lock screen is not something that bothers you with touch screen, it can be really annoying on desktop computer, because you have to log back every time you are inactive for a while.
Fortunately there are a few methods how to disable this feature and we will show you a couple of them.
Contents:
- How to disable lock screen with Registry Editor
- Create a Windows .reg registry data file with disable or enable lock screen value
- How to disable lock screen with Local Group Policy Editor
How to disable lock screen with Registry Editor
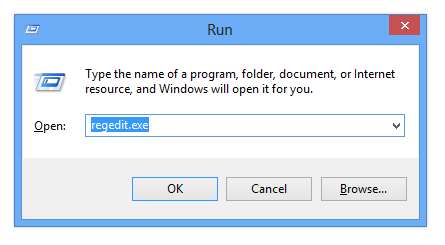
The easiest way is probably to change Windows registry. In Metro UI start type "regedit.exe".
Click on Registry Editor icon. Also you can use Win+R key → type "regedit.exe" and press Enter.
Windows 8 run Registry Editor
Navigate to HKEY_LOCAL_MACHINE\SOFTWARE\Policies\Microsoft\Windows\Personalization registry key.
If you don't find Personalization key, you will need to create it in Windows key by Edit → New → Key.
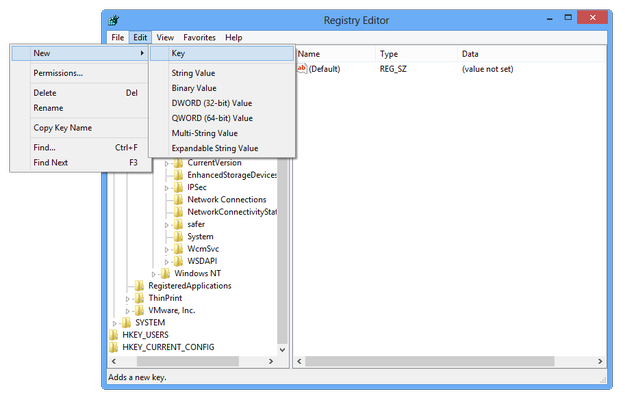
Registry Editor create a new key
In Personalization key, click on Edit option in menu → New → DWORD value and named it NoLockScreen.
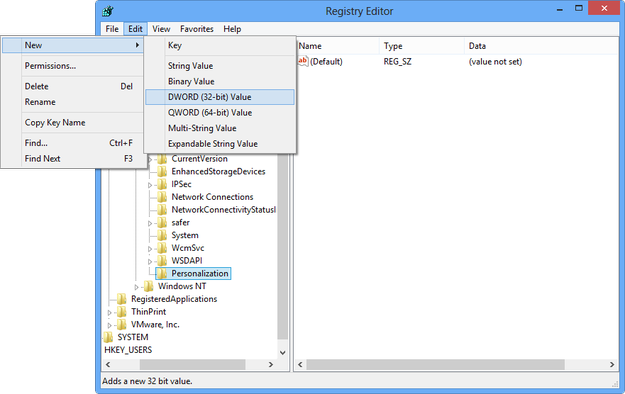
Registry Editor create a new DWORD Value
Double click on NoLockScreen DWORD value and set value to 1.
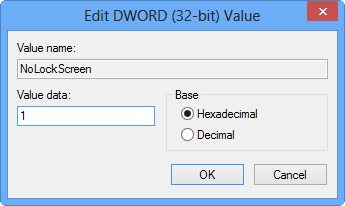
Registry Editor edit DWORD Value
Close Registry Editor and restart Windows.
If you would like to enable the lock screen again, open the Registry editor and delete DWORD NoLockScreen from Windows registry and restart the operating system.
Create a Windows .reg registry data file with disable or enable lock screen value
You can also manually create a registry file that can be imported to Windows.
Open Microsoft Windows Notepad and copy/paste, or re-type this text to new text document:
Windows Registry Editor Version 5.00
[HKEY_LOCAL_MACHINE\SOFTWARE\Policies\Microsoft\Windows\Personalization]
"NoLockScreen"=dword:00000001

Windows Notepad create disable lock screen registry file
Go to the File menu → Save as...
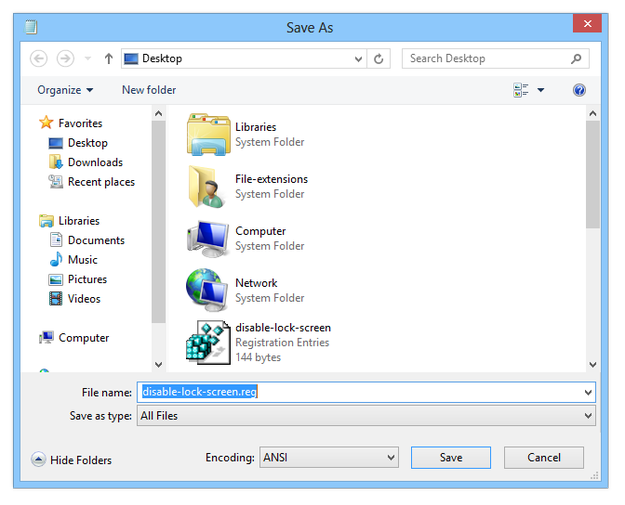
Notepad Save as... option
Set the Save as type to All Files. Named the new registry file in our case "disable-lock-screen" with .reg file extension (disable-lock-screen.reg). Save it for example on Desktop.
Double click on disable-lock-screen.reg file, allow changes in registry and restart the computer to enable registry changes.
To enable lock screen feature create a .reg file in Windows Notepad with this content:
Windows Registry Editor Version 5.00
[HKEY_LOCAL_MACHINE\SOFTWARE\Policies\Microsoft\Windows\Personalization]
"NoLockScreen"=-

Windows Notepad create enable lock screen registry file
Save the registry file. Double click on it and restart computer to enable changes in registry.
How to disable lock screen with Local Group Policy Editor
Another option is to use the Local Group Policy Editor. It is a Microsoft Management Console (MMC) utility that provides a single user interface through which all the settings of Windows Local Group Policy. However, this editor is only available in Professional and better version of Microsoft Windows.
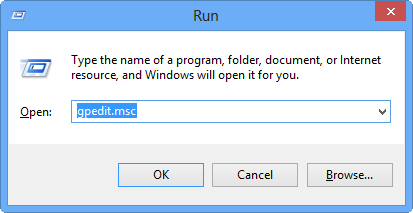
In Metro UI start type "gpedit.msc". Also you can use Win+R shortcut and type "gpedit.msc" and press Enter.
Run Local Group Policy Editor
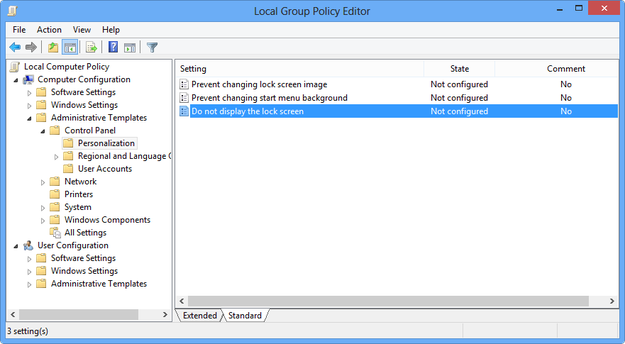
Navigate to Computer Configuration → Administrative Templates → Control Panel → Personalization.
Local Group Policy Editor Personalization settings
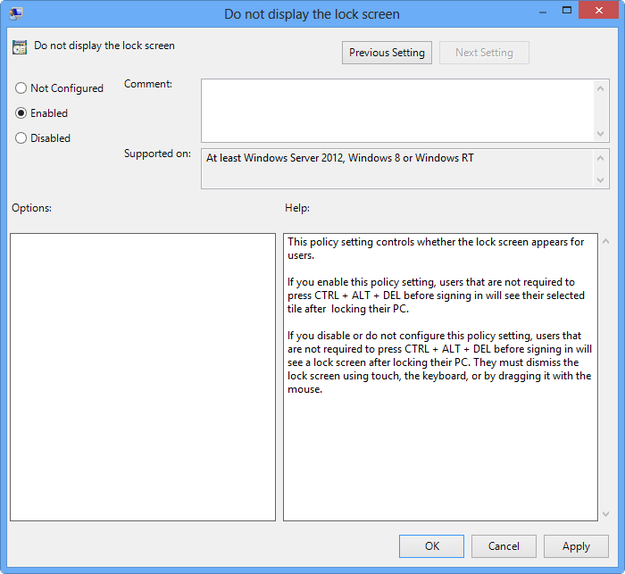
Double click on Do not display the lock screen option and set value to Enabled. Click on Apply button and after that on OK button.
Local Group Policy Editor disable lock screen
Close Local Group Policy Editor and restart the system.
If you want to enable the lock screen again, open Local Group Policy Editor and set Do not display the lock screen option to Not configured.