Introduction
![]() Do you have a bootable partition with operating system stored in Acronis True Image TIB backup file and you need to run any software from system stored in the backup, or you need to copy documents, photos or other data from backup?
Do you have a bootable partition with operating system stored in Acronis True Image TIB backup file and you need to run any software from system stored in the backup, or you need to copy documents, photos or other data from backup?
Acronis operating system backups can be run in virtualization applications like VMware Workstation. However, it requires a few steps before you can do so and we will show you how to do it.
Content of the article:
- Converting Acronis TIB backup file to Microsoft VHD Virtual Hard Drive file
- Converting VHD Virtual Hard Drive to VMware VMDK Virtual Machine Disk format
- Create new virtual machine in VMware Workstation
Converting Acronis TIB backup file to Microsoft VHD Virtual Hard Drive file
Acronis backup solutions use proprietary disk image and archive format that has TIB file extension. Data in TIB files can be compressed, encrypted and protected with password.
First thing you need to do, is to convert the TIB image to VHD Virtual Hard Drive format.
Older versions of TIB files created by Acronis True Image version 10 and 11 (released in 2006 and 2007) can be converted by the VMware vCenter Converter Standalone directly to VMDK disk format.
Download and install the Acronis True Image to your computer. It is available as a trial that works 30 days after installation.
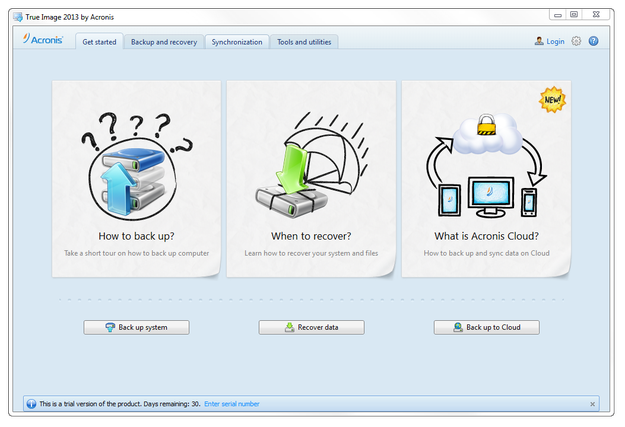
Acronis True Image main window
Start True Image. Click on Tools and utilities tab. Scroll down by the list of tools and select Acronis backup conversion option.
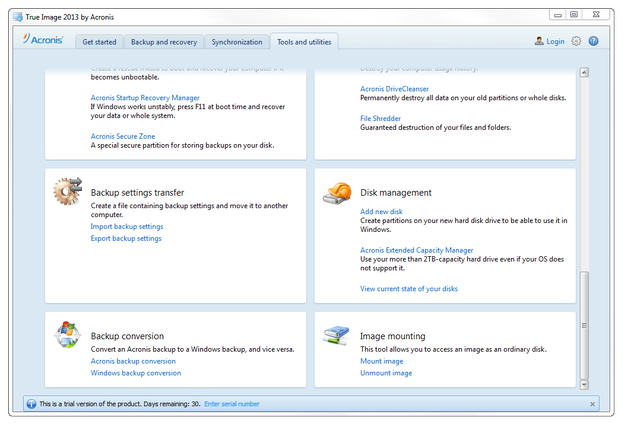
Acronis True Image tools
Select the backup archive from the table, or click on Browse button and select .tib file from any other directory and click on Next button.
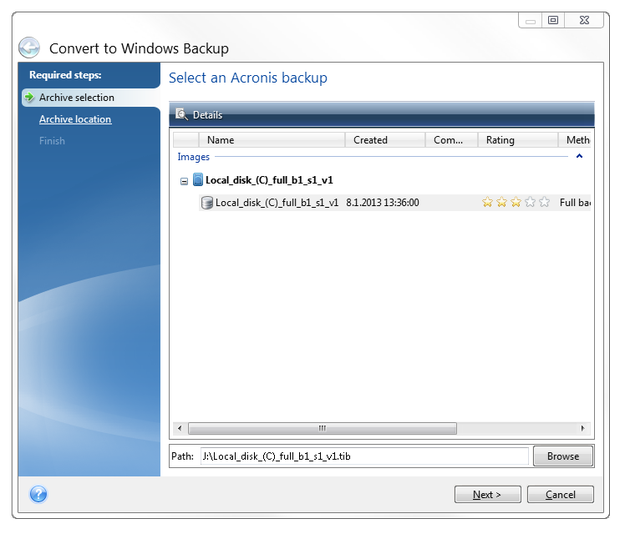
Acronis True Image conversion tool select .tib file
Select location for new VHD file and click on Next button.
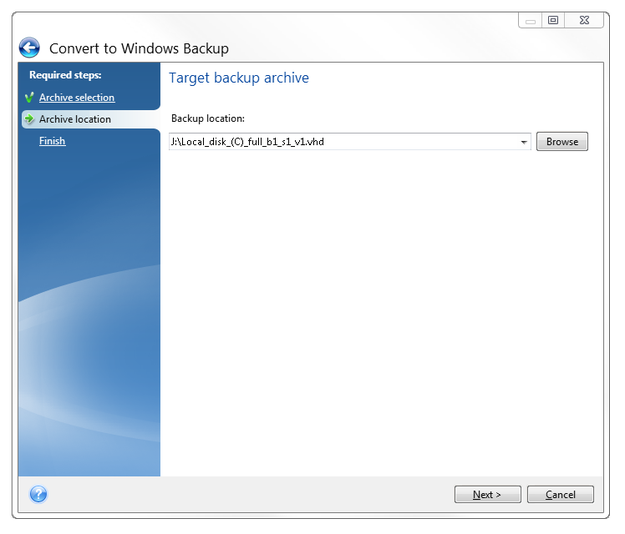
Acronis True Image conversion tool select destination
In the summary window click on Proceed button.
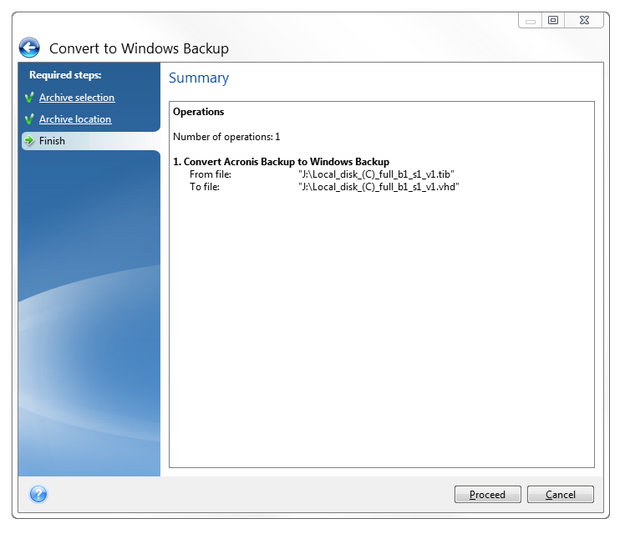
Acronis True Image conversion tool summary
Wait till the conversion will be finished.
Converting VHD Virtual Hard Drive to VMware VMDK Virtual Machine Disk format
VMware Workstation is not able to use VHD disk format as a virtual drive for its virtual machines, but with free StarWind V2V Image Converter you can simply transform VHD disk to VMware VMDK file format.
Start V2V Image Converter and Click on Next button. Select source file, in our case converted TIB backup.
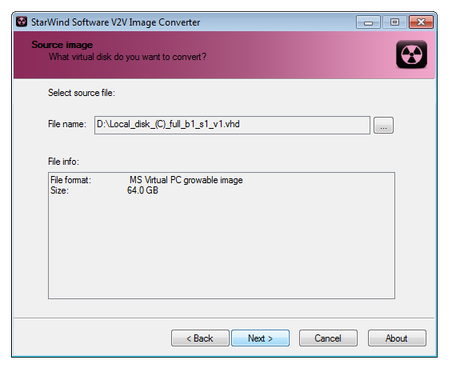
V2V Image Converter select source
Select new image format, in our case VMWare growable image.
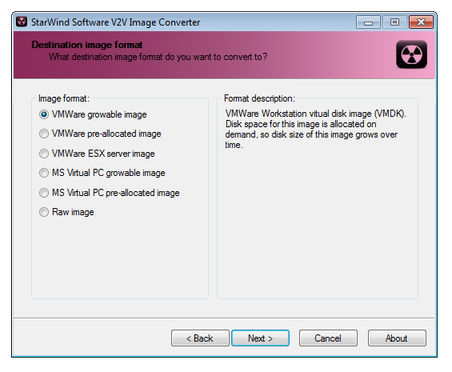
V2V Image Converter select image format
Virtual disk type set as a SCSI drive.
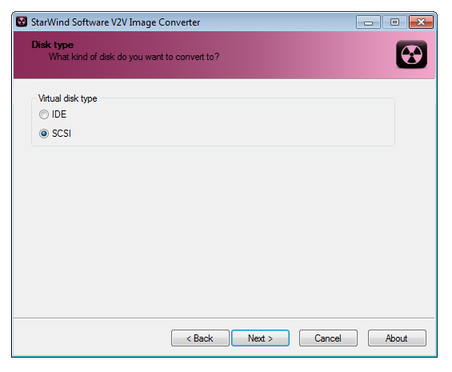
V2V Image Converter select kind of disk
Select output destination and name. Click on Next button and wait till the conversion will be finished.
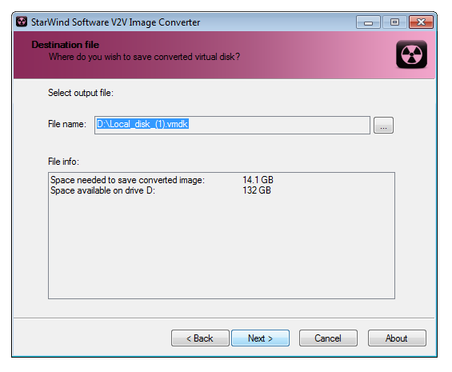
V2V Image Converter select output
Create a new virtual machine in VMware Workstation
Now you have prepared bootable virtual disk for VMware Workstation. Open VMware Workstation and select File menu → New Virtual Machine option. WMware will open the New Virtual Machine Wizard.
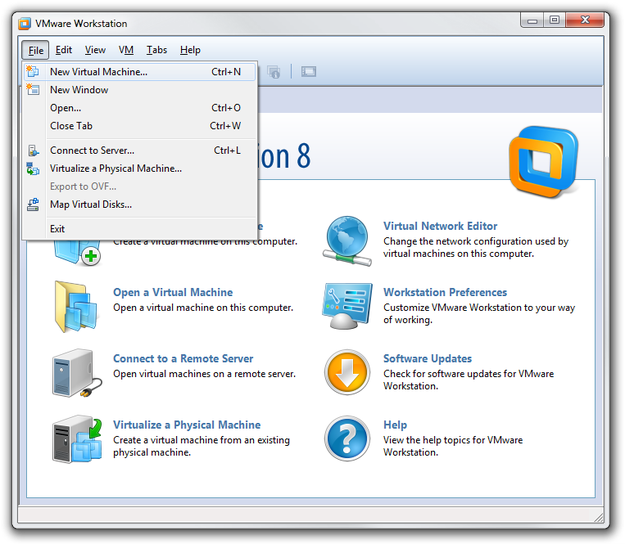
VMware Workstation create new virtual machine
Select Advanced option.
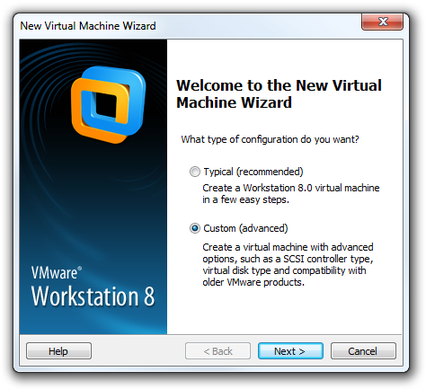
VMware Workstation Virtual Machine Wizard
Select Virtual Machine compatibility (virtual machine features).
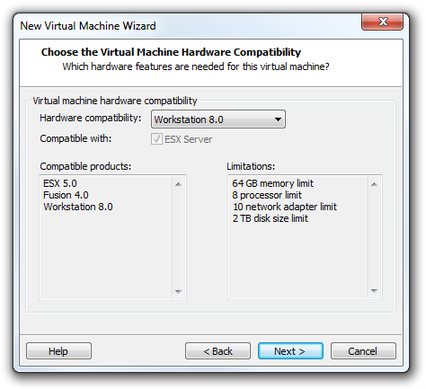
VMware Workstation Virtual Machine Wizard hardware compatibility
Select I will install the operating system later option.

VMware Workstation Virtual Machine Wizard guest operating system
Select guest operating system.
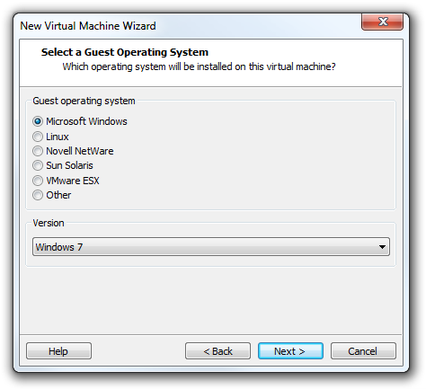
VMware Workstation Virtual Machine Wizard select OS
Set the virtual machine name and location.
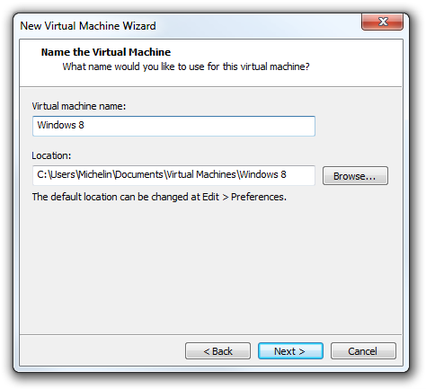
VMware Workstation Virtual Machine Wizard set name and location
Set processor configuration.
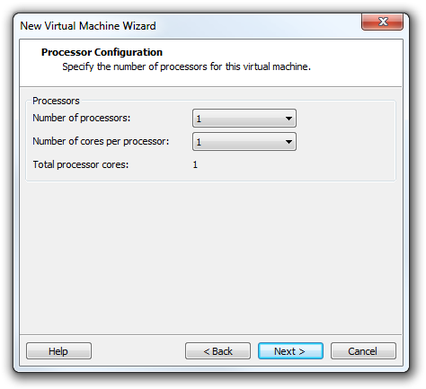
VMware Workstation Virtual Machine Wizard processor settings
Set memory size.
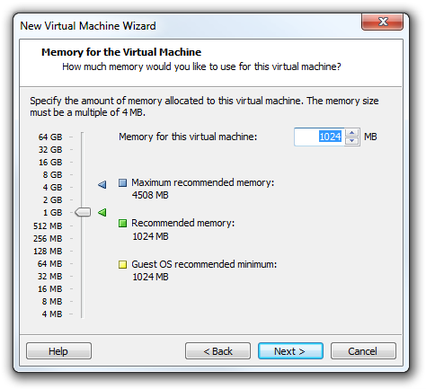
VMware Workstation Virtual Machine Wizard set memory size
Set network type.

VMware Workstation Virtual Machine Wizard network settings
Select I/O controller type to LSI Logic SAS.
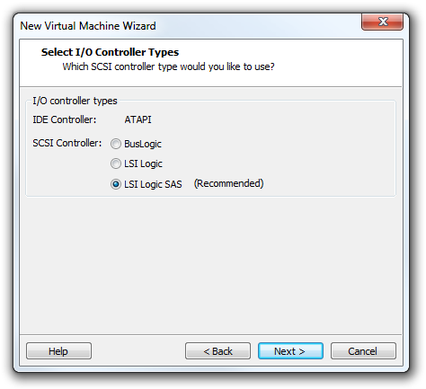
VMware Workstation Virtual Machine Wizard controller settings
Select Use an existing virtual disk option and select the .vmdk file from your hard drive.
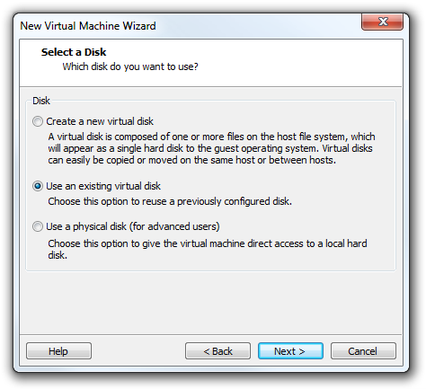
VMware Workstation Virtual Machine Wizard select disk
You can read a review of new virtual machine and click on Finish button.
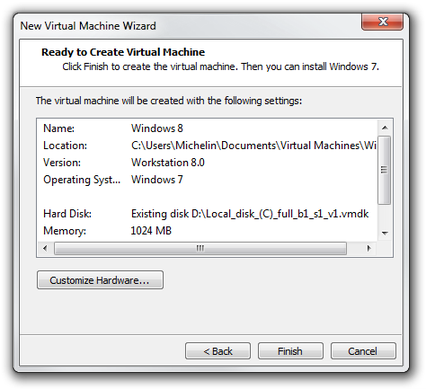
VMware Workstation Virtual Machine Wizard summary window
And that's it. Click on Power on this virtual machine option and wait until the system will boot.
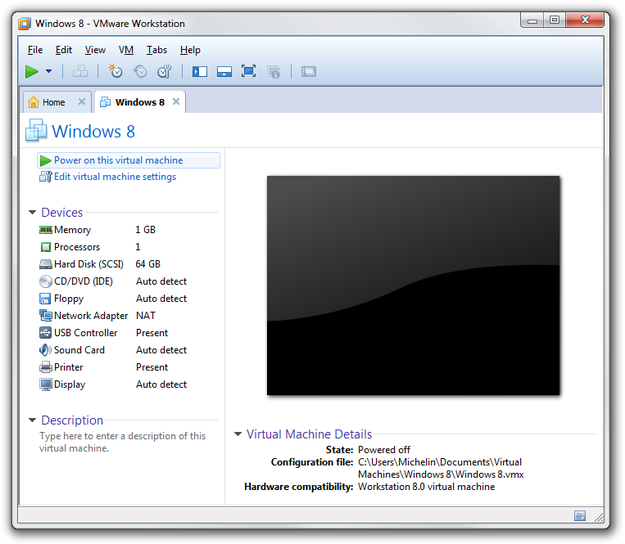
New Virtual Machine ready to power on

