
 Language
Related extensions:
Do you want to create standard DVD from your videos made during your last holiday, so you can play it in classic DVD player and watch on TV ? To compile one video sequence out of many videos ? The Windows DVD Maker is a simple software, which can easily help you achieve all this.
You do not need to worry about complicated programs. Since Windows Vista, Microsoft made many users happy, after creating Windows DVD Maker and making it a standard part of the OS. In just couple of simple steps below, we will show you how to create DVDs, even if you are no expert in this area.
Step 1
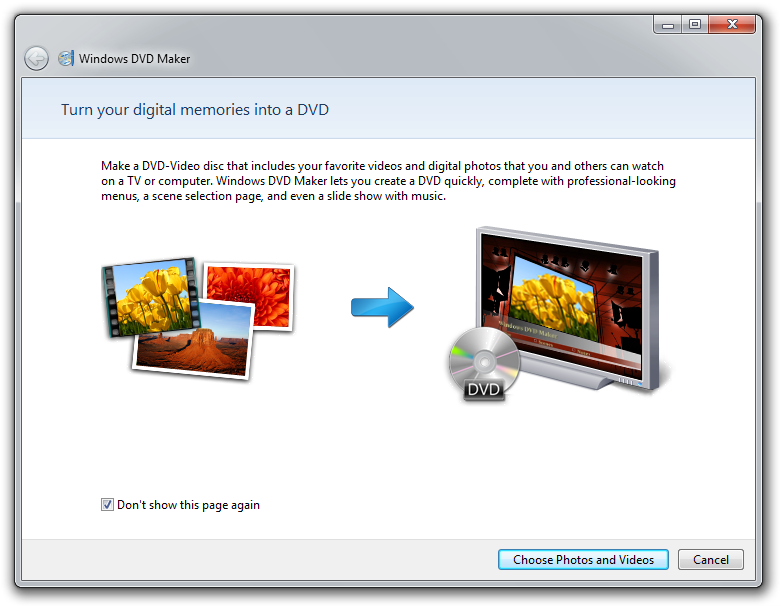
Launch the application
You can find the Windows DVD Maker shortcut in the Start Menu → All Programs. Just click on it and the application will launch. The first time you launch the application a "First-Start Screen". You check the "Don't show this page again" box so it never appears again. To continue click on the "Choose Photos or Videos" button.
Step 2
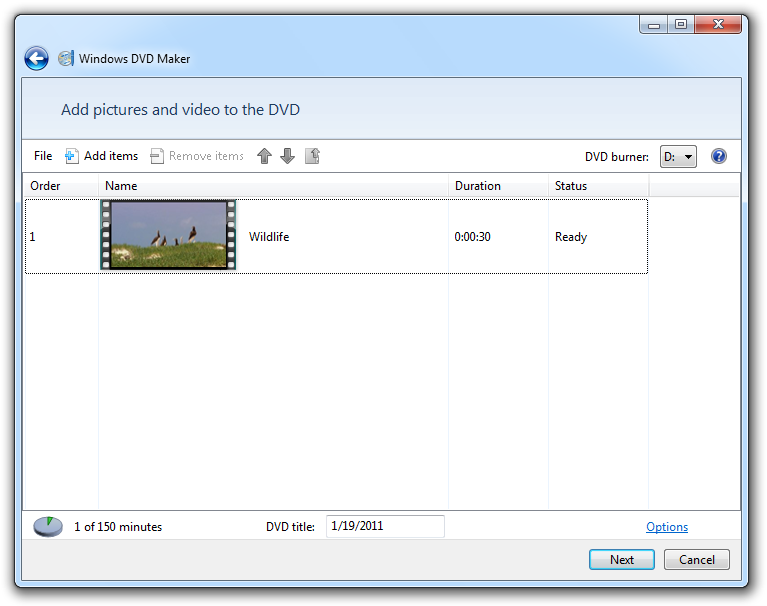
Choose Photos and Videos
In the following window you can see all data files, you have added for burning on a DVD. To add a file, simply click on the Add Items button and browse to the files you wish you burn on the DVD. Press OK and the file will appear in the main window. If you are not happy with some file you have added to the compilation, you can simply remove it by selecting it and clicking on the Remove Items button. You can also sort the sequence of the files with the arrow icons.
Below on the window is total time of videos added to the compilation, which can help you to have a better idea about the DVD you will be burning. Next to the total playback time is the name of your DVD, "DVD title". Simply change the name by clicking into the box and typing a new name you want your DVD to have. The default name of DVDs create in Windows DVD Maker is the current date.
Step 3
Change the format and other settings
Next thing you need to do, is to click on Options in the lower right part of the main window. A new window will appear in which you can set various parameters for your new DVD, including format, aspect ration, burning speed and more.
You can also change the playback settings so your DVD either starts with DVD menu, ends with DVD menu after the playback, or if your compilation should play in a continuous loop. Once you are satisfied with your settings, click on the OK button.
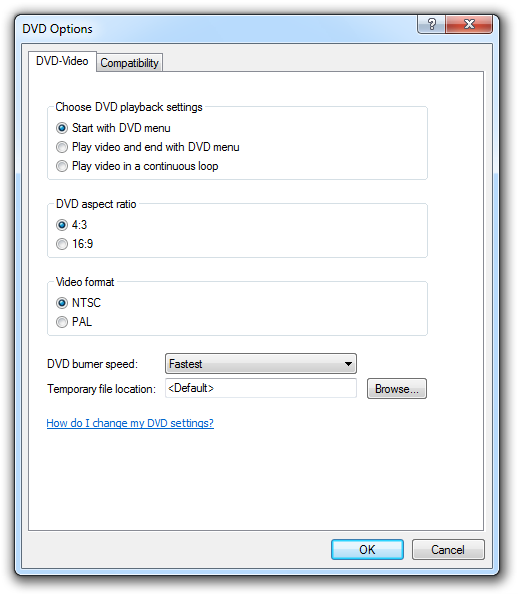
If your computer has more than one DVD burner, don't forget to to chose the proper one. After you have everything set and ready, click on the Next button.
Step 4
Customize your DVD
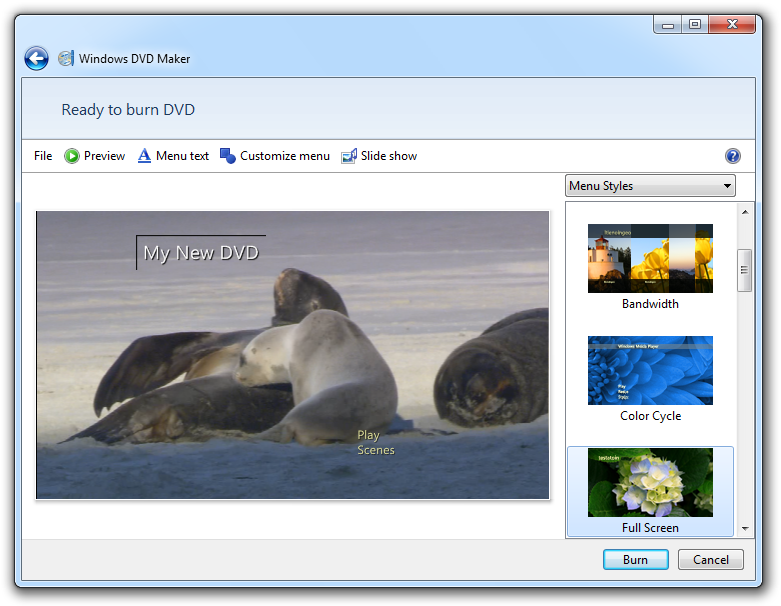
On the next window you can Customize Menu choose the look of the DVD menu from several pre-designed styles. You can also change the texts, the size of individual windows or set parameters for slideshows of your photographs, where you can also add sounds and music in the background.
After you you have made the changes you can use the Preview to check the look of your compilation.
Step 5
Burn your DVD!
After you are satisfied with your compilation and its settings, insert empty DVD in your drive and click on the Burn button and your DVD will be burned.