Language
Tutorial: Editing host files on Mac
![]() Hosts file is IP network protocol configuration file used by operating system to map the hostnames to IP addresses. Often it is being modified to block malicious sites or sites with inappropriate content, for web development, to redirect domain names to local addresses etc.
Hosts file is IP network protocol configuration file used by operating system to map the hostnames to IP addresses. Often it is being modified to block malicious sites or sites with inappropriate content, for web development, to redirect domain names to local addresses etc.
If you enter any URL in the web browser, the system first checks the hosts file. Whether there is not relevant host map to URL, it resolves the IP address via DNS servers.
It can also be abused by malware to redirect domain, for things like phishing your Internet banking to other IP address to steal your bank account password.
The Hosts file is stored in a simple text file format and can be found as "hosts" without any file extension in the /private/etc folder.
Example of standard hosts file on Mac without any modifications:
#

# Host Database

#

# localhost is used to configure the loopback interface

# when the system is booting.  Do not change this entry.

#

127.0.0.1       localhost

255.255.255.255 broadcasthost

::1             localhost

fe80::1%lo0     localhost
The # symbol indicates comments, that provide information for users.
How to edit hosts file in macOS / OS X operating system
Hosts file on Mac protected against re-write and cannot be simply edited by TextEdit or other text editors. However, you can use Terminal application that has permissions to edit hosts system file.
Step 1 - Open Terminal
Open Finder. Navigate to the Applications folder → Utilities and double click on Terminal.app application (also can type Terminal to Spotlight search).
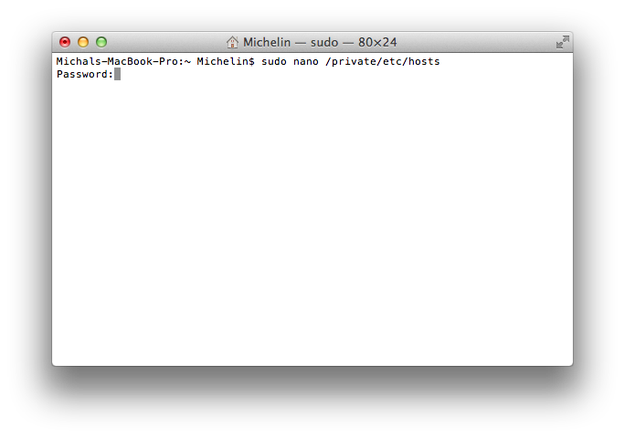
Step 2 - Open hosts file
Type sudo nano /private/etc/hosts to Terminal command line. You will be prompted to your administrator password. Type it and press Enter button.
Step 3 - Edit hosts file
The hosts file will be opened in GNU nano text editor for Terminal. Now you are able to edit current host mappings, or type new ones. You can navigate the hosts file with arrows keys.
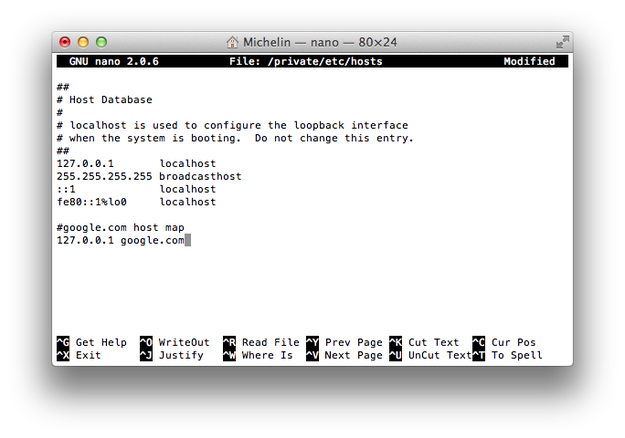
You can also type a comments to your host mappings. Comments must start with # symbol.
Step 4 - Save hosts file
When your editing is finished press Ctrl + O shortcut to save changes in the hosts file. To exit from GNU nano press the Ctrl + X shortcut.
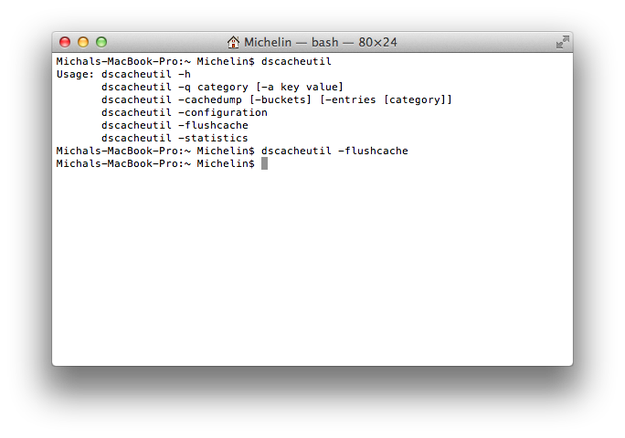
Step 5 - Flush DNS Cache
To load new hosts maps to the system, you must flush DNS Cache. There are two ways how that can be done. Stay in Terminal.app and type dscacheutil -flushcache command, or simply restart the operating system.