
 Language
Related extensions:
Picasa was officially discontinued in 2016 and replaced by Google Photos. Yet some users still like to use it despite the lack of further support. You can still find it on some 3rd party software distribution websites, but the on-line functions of the program are probably limited.
TIP: Google Picasa
![]() Picasa was released in 2002 as picture image and digital photo viewing and management software, as well as digital photo web sharing service available for all desktop platforms.
Picasa was released in 2002 as picture image and digital photo viewing and management software, as well as digital photo web sharing service available for all desktop platforms.
It is one of the most useful free picture editing tools available, because it offers some great features, like face recognition, geo-tagging, effects, and text overlay tools.
Install and setup Google Picasa
Download the installation package from any source available. In our case we will use a Mac version, which is distributed as a .dmg package, but it works almost the same on Windows.
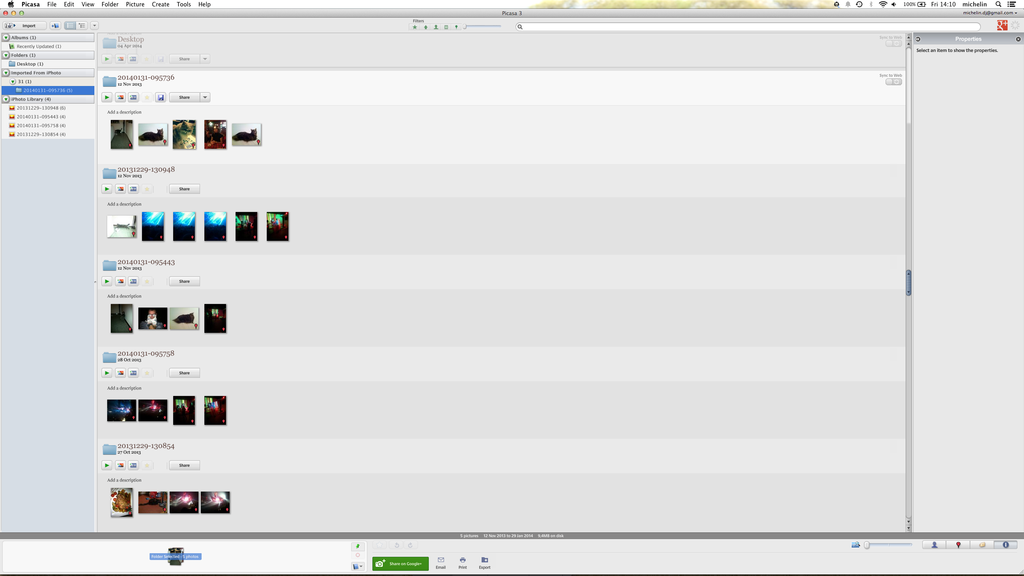
Open it and copy the Picasa.app file to your Applications folder. Start Picasa application. At first, you will be prompted with Picasa import service, which allows you to import photos to Picasa local database. You can import photos from specified folders and libraries, like iPhoto or check whole computer.

Picasa import feature
After Picasa checks your storage, it will show you a Library with all your found photos organized in folders, as well as a list of faces recognized on them.
If you don't want to use Picasa only as a photo editor and also share your photos on-line, you need to login with your Google account. Photos will be shared on your Google+ profile (The older versions of Picasa uses Picasa Webalbum service that is still available on this URL).
By default Picasa doesn't support sharing photos with other social networks or services, like Facebook and Flicker. However, there are 3rd party plugins like Picasa Uploader for Facebook and Picasa to flickr, with which Picasa can upload photos to these popular social networks.
Other settings for Google Picasa, like file types, printing, network, etc. are available in File Menu → Preferences (Tools → Options in Windows).
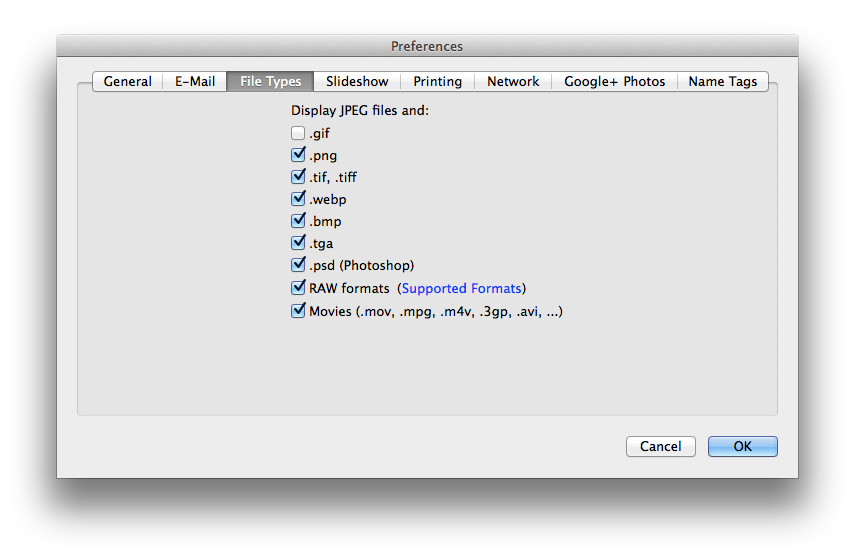
Picasa supports PNG, TIF, WEBP, BMP, TGA, PSD, Digital photo RAW formats and some kind of video formats.
Editing and enhancing photos with Picasa
After you have imported photos to Picasa you are able to edit them. Double click on a photo and you will enter the Picasa editing mode.
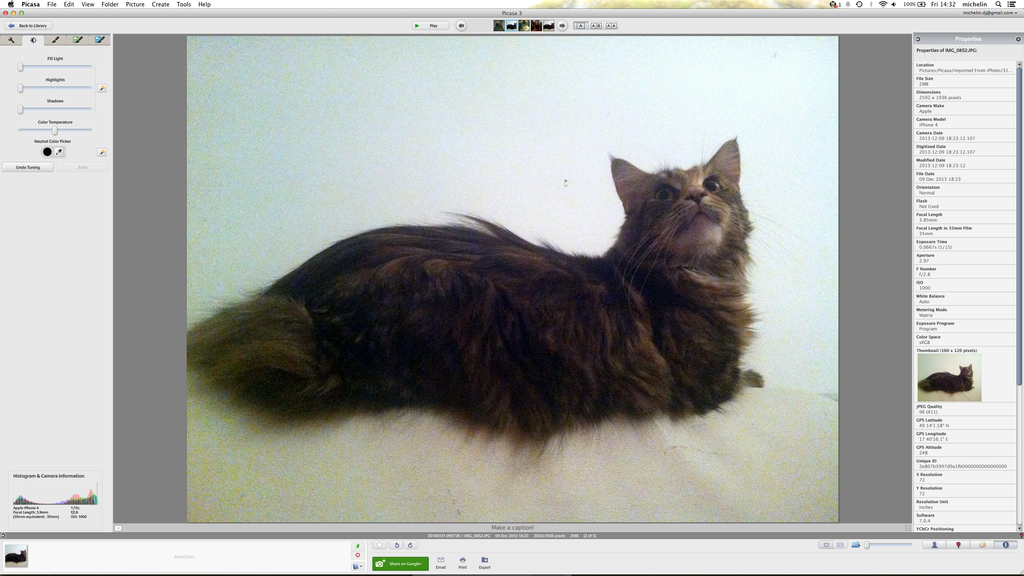
Picasa editing window
At the right bar you can find various fixes and filters to enhance your photos, including light fixes, redeye fixes, retouch, contrast, etc. It also contains a histogram information.
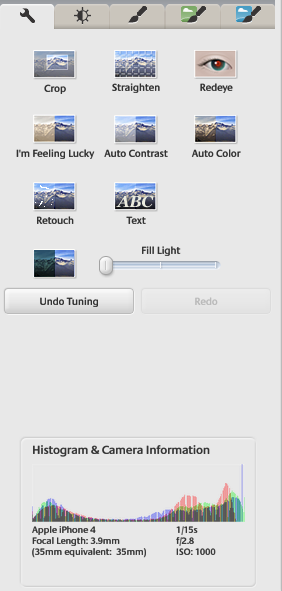
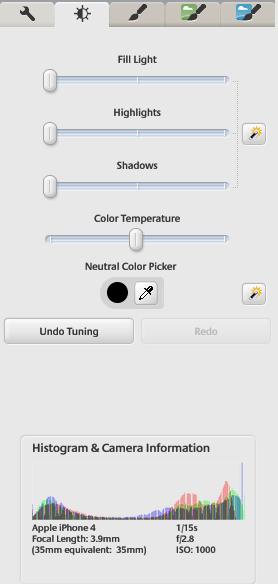
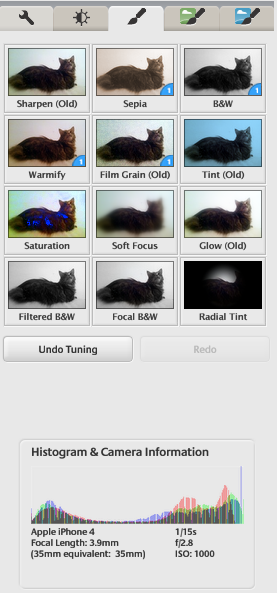
Picasa editing tools
Under edited photo you can find other options, like rotating, sharing, exporting, add places, recognize faces, add photo tags etc.

Picasa editing tools
If you have enhanced your digital photo, you can save it to Picasa database and post on your Google+ on-line photo gallery. It is also able to export your photos as a collage, html page, create movie show, or burn gift CD.
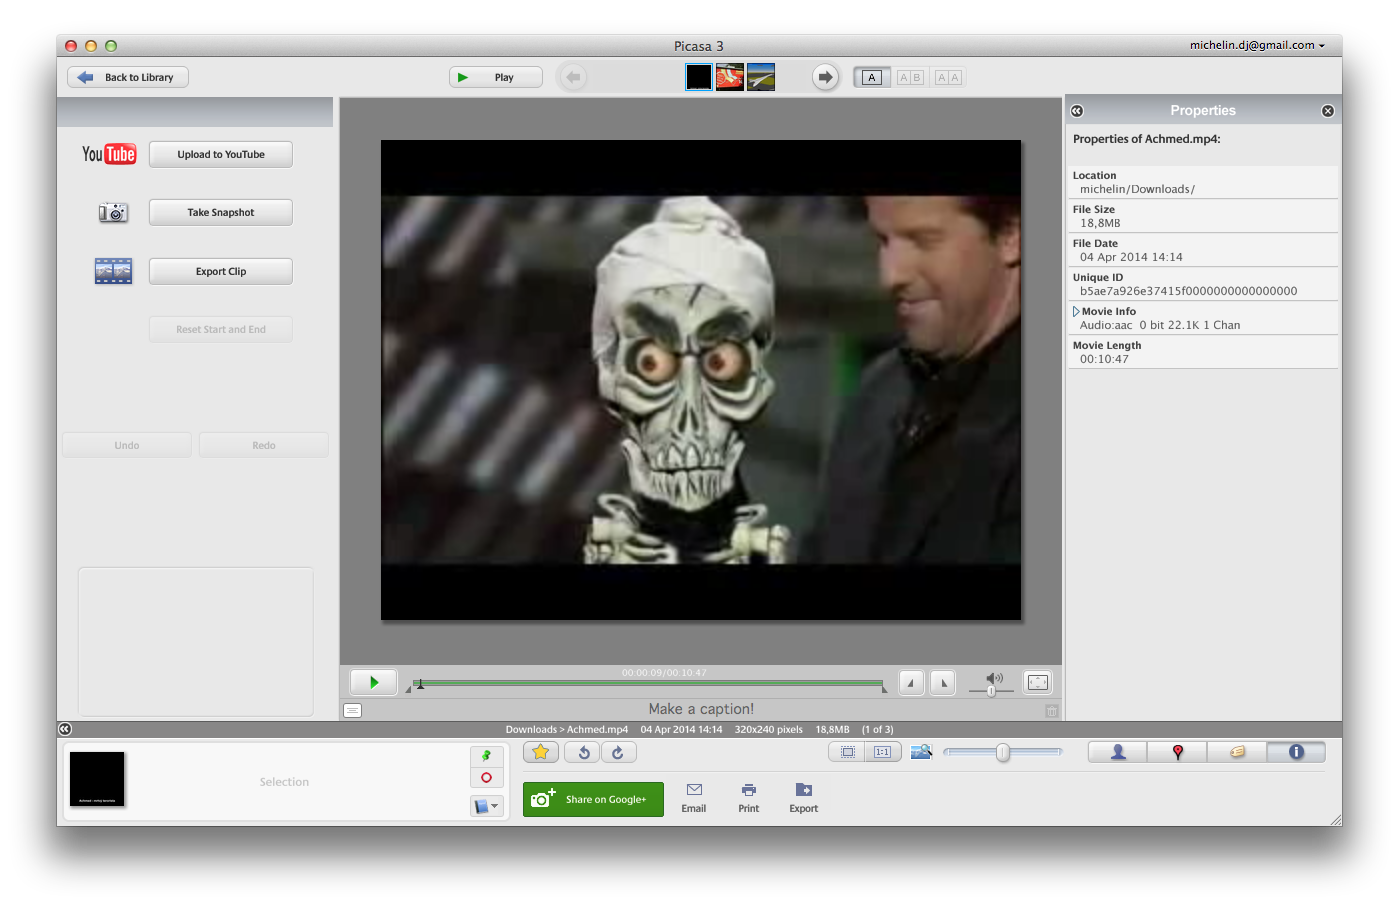
Picasa can also help you with video files. You can playback various types of video directly in Picasa, create screenshots, make clips as well as upload and share your videos on Youtube.
As you can see Google Picasa is an ideal platform for easy management, editing and sharing of digital photos. It doesn't contain any sophisticated editing features, like its competitors, but it is free of charge and that's very powerful argument to use this piece of software.