
 Language
Related extensions:
Guide how to run Android on PC using VirtualBox
![]() Google Android is one of the most used Linux-based operating system these days and can be found in smart phones and tablets as well as smart TVs, set-top boxes, DVR recorders, smart watches, car entertainment systems and probably plenty of other devices.
Google Android is one of the most used Linux-based operating system these days and can be found in smart phones and tablets as well as smart TVs, set-top boxes, DVR recorders, smart watches, car entertainment systems and probably plenty of other devices.
Because Android is a free and open source project that supports various microprocessor architectures (ARM, x86, x86-64), you can also potentially install it on desktop computers, or virtual machines. However, the default desktop (called Launcher) is primarily customized for touch screens and controlling by mouse and keyboard can be (and it really is) a little bit clumsy.
A few months ago, people from Jide Technology introduced Remix OS, a port of the Google Android operating system customized to be used like classic desktop system, similar to Microsoft Windows. The main advantage is that you can potentially use windows Android apps and have fully-fledged multitasking between them.
So now let's take a look on how you can install Remix OS safely to a virtual PC machine made in Oracle's VirtualBox, so you can try Android and many of the apps for it directly on your computer.
Contents:
- Set up virtual machine for Remix OS in VirtualBox
- Install Remix OS operating system to VirtualBox machine
- Install Google Play to Remix OS
How to install Google Android to VirtualBox
Download and install VirtualBox to your computer and also download archive with a bootable ISO image of Remix OS.
There are two versions of Remix available, a 32-bit for slow PC (or PC without 64-bit OS) and a 64-bit version for fast PC with 64-bit operating system. Extract the ISO image from the archive to your hard drive so you can access it later.
Create virtual machine for Remix OS in VirtualBox
Start VirtualBox → click on New button → set the name of virtual machine (Remix OS) → set Type to Linux → set Version to either "Other Linux 32-bit" or "Other 64-bit" depending on the one you have downloaded → and finally click on the Next button.
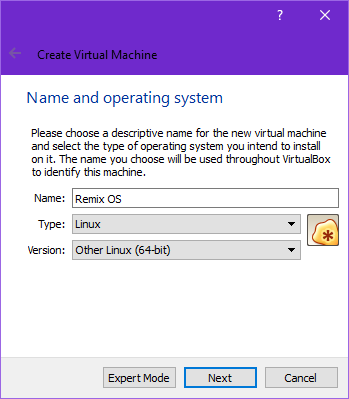
Create new virtual machine
Set virtual RAM to half of the RAM assigned to the physical machine → click on the Next button.
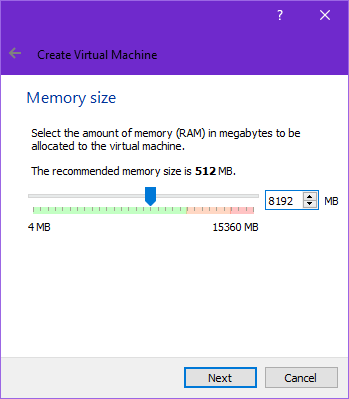
Set memory size
Now pick "create a virtual hard disk now" → and click on the Create button.
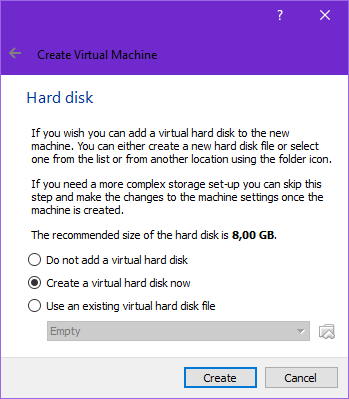
Create new virtual drive
Now select the Hard disk file type → set VDI (VirtualBox Disk Image) → and continue with Next button.
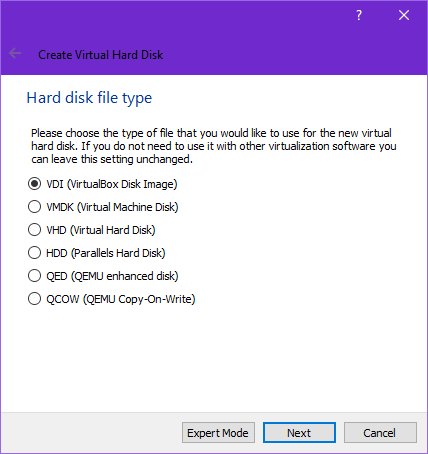
Set virtual drive type
Storage on physical hard disk → Set Dynamically allocated → Next button.
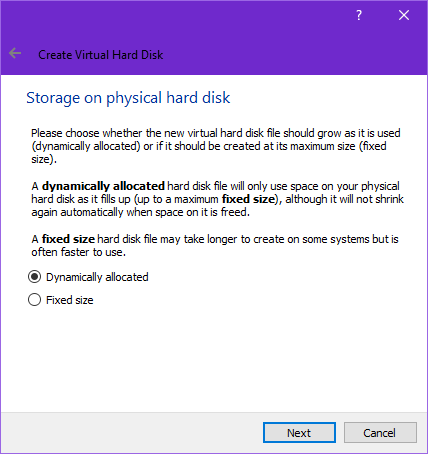
Set allocation type
Now you will need to define file location (browse to the location) and size of the virtual disk → so set at least 16 GB → continue with create button
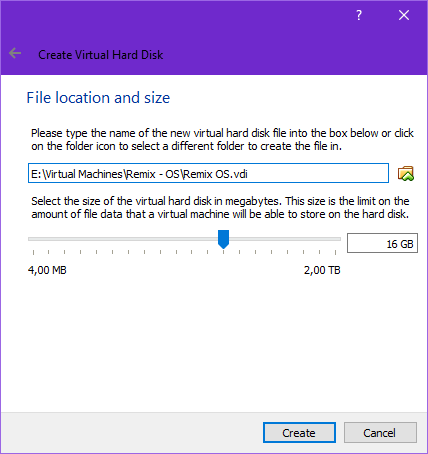
Set size of disk
Click on Settings button → Storage → Click on optical mechanic → Click on CD icon next to Optical Drive: option → Select Choose Virtual Optical Disk File... option → Navigate to Remix OS ISO → OK button.
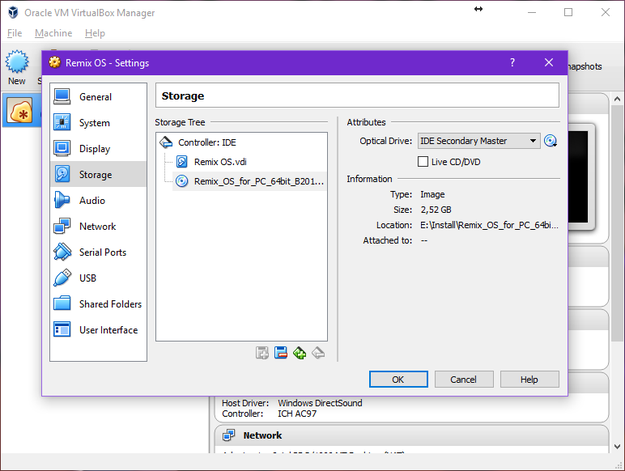
Mount ISO image with Remix OS
Install Remix OS to VirtualBox virtual machine
Click on Start button and wait until the Remix OS start boot menu appears → after that press TAB button on your keyboard.
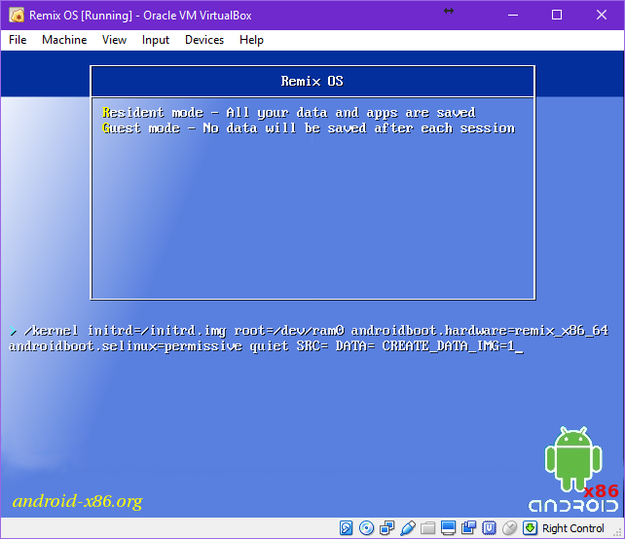
Remix OS boot options
You now need to to delete the following line "SRC= DATA= CREATE_DATA_IMG=1" and replace it with "INSTALL=1 DEBUG=" → and continue with Enter.

Remix OS installation commands
Select Create/Modify partitions → Press Enter.
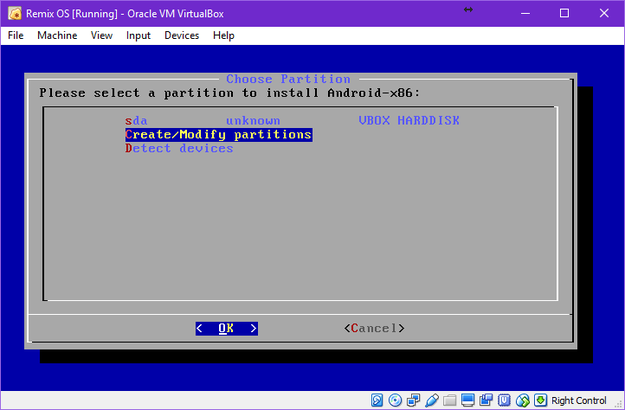
Create partitions for Remix OS
Do you want to use GTP? → No.
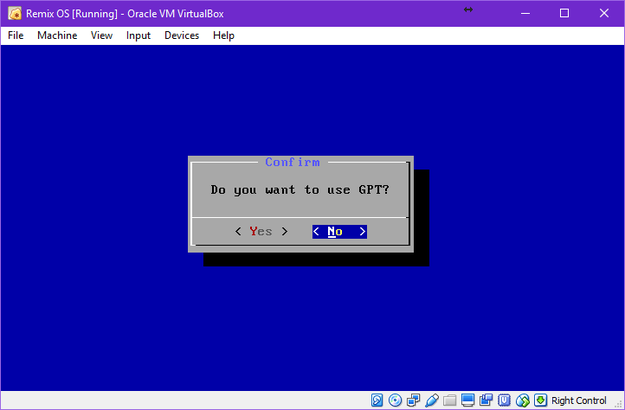
GPT options
In cfdisk tool select New option → Primary → Set Size (size of virtual hard drive minus size of virtual RAM) → Beginning → Bootable → Write.
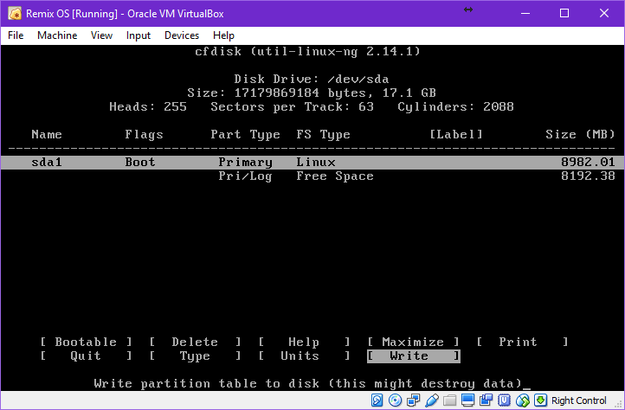
cfdisk tool for Linux
Select another drive → New → Logical → leave Size → Write.
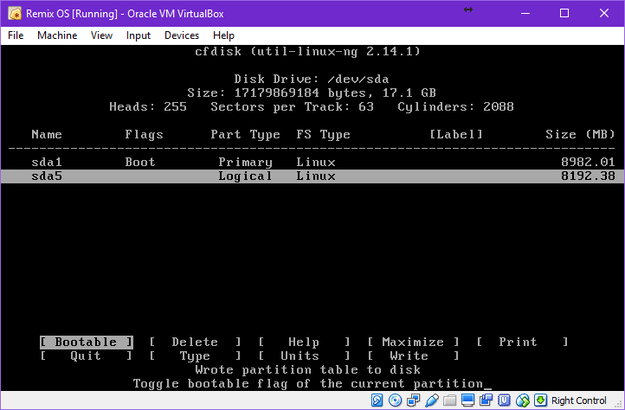
cfdisk tool for Linux
Select Type option → Enter filesystem type: 82 and press Enter Select Write option in cfdisk → after that Quit option.
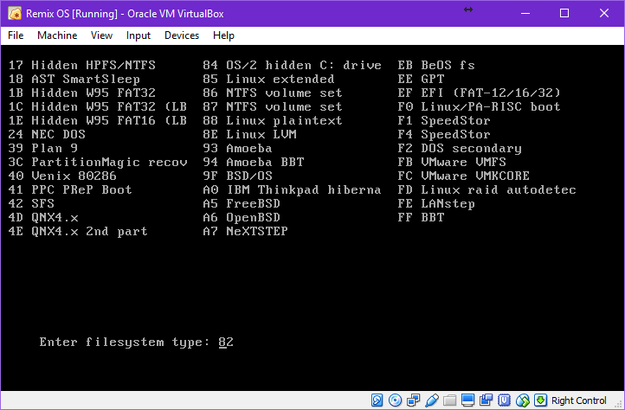
Set partition type in cfdisk
Select sda1 partition → Press OK.
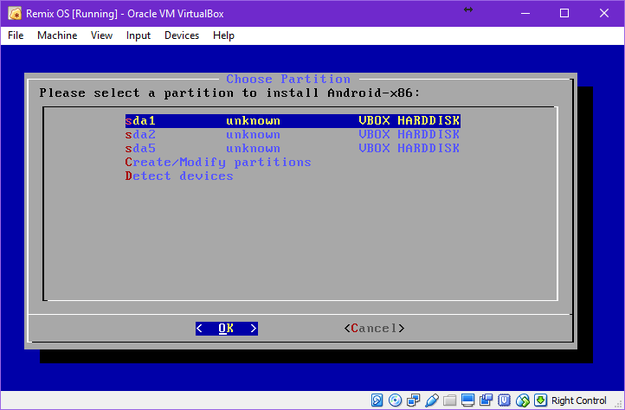
Select installation partition for Remix OS
Select a filesystem ext4 → Press OK → Confirm format.
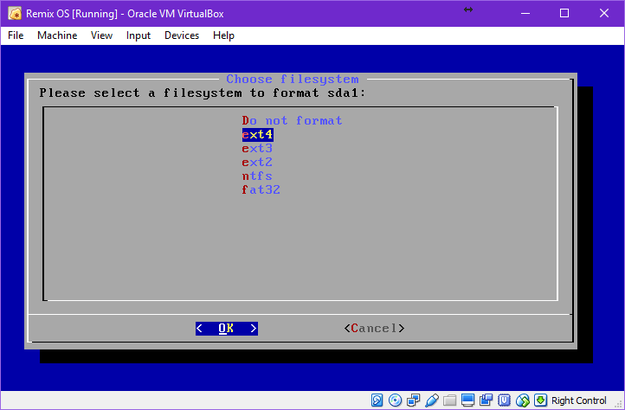
Select partition file system
Confirm installation of GRUB boot loader and skip installation of EFI GRUB2.
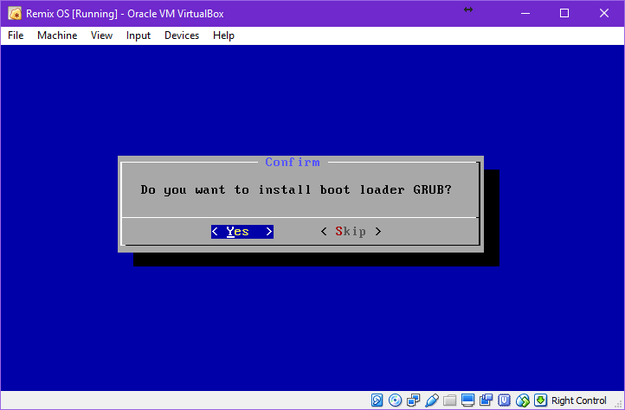
Install GRUB boot loader
Do you want to install /system directory as read-write? → Yes.
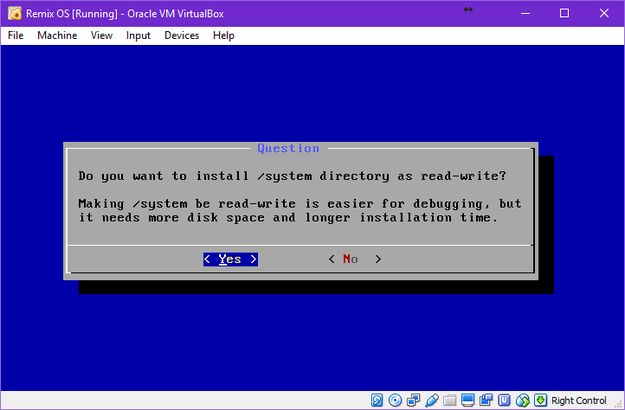
system directory options
Wait till the installation is finished.
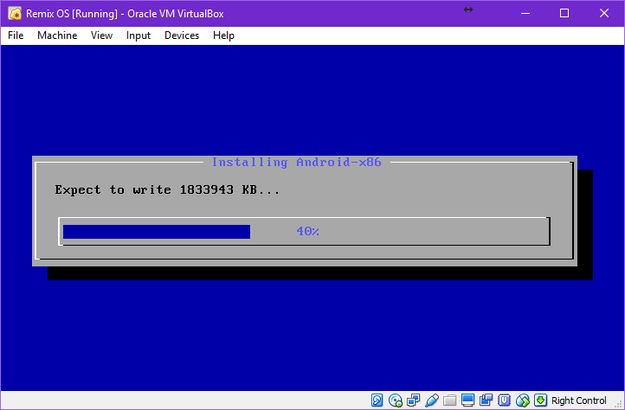
Installation progress
Select Run Android-x86 option → OK button.
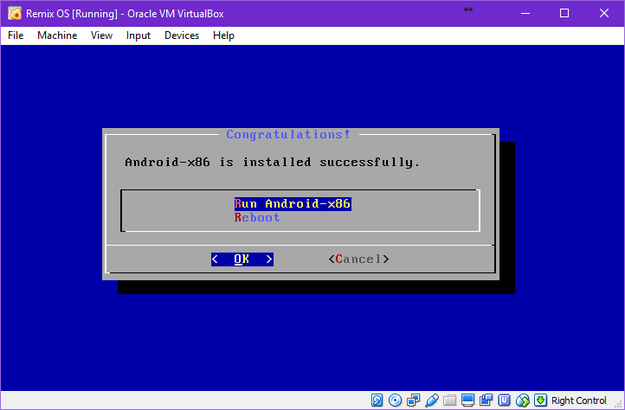
Congratulations! Remix OS installation is done
Wait till the Remix OS boot (about a few minutes).
Remix OS boot logo
Select your language → Click Next.
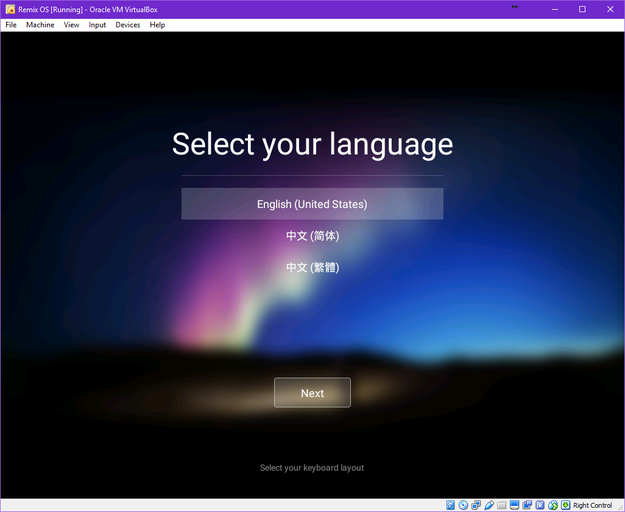
Select your language
Now you can work with Google Android like with any other desktop-like operating system.
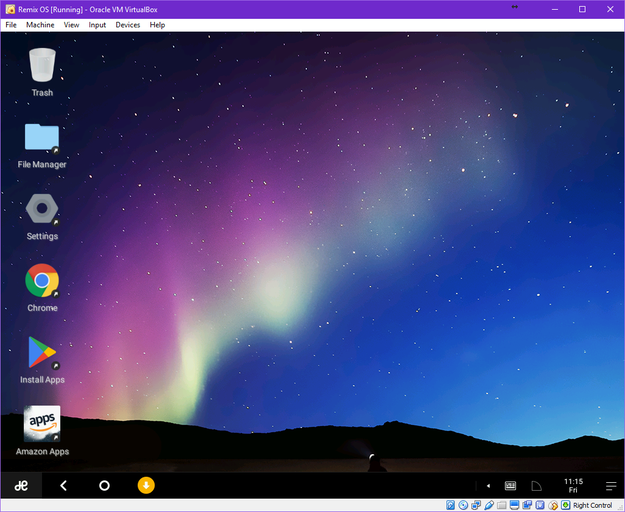
Remix OS desktop
Install Google Play Store to Remix OS
Remix OS lost in version 2.0 it's certification from Google and doesn't contain Google's services, such as Google Play Store, Gmail, etc., anymore. But you can restore the functionality with the following set of commands so you will be able to install Google services back to Remix OS.
press Alt+F1 to open root terminal and type:
- pm disable com.jide.apppolicy
- pm enable com.android.vending
- pm enable com.google.android.gms
- pm enable com.google.android.gsf
- pm enable com.google.android.gsf.login
Note: press Alt+F7 to close root console and reboot the system!! Don't forget remove an installation ISO image from virtual optical drive!!
Now Google Play Store is available in the Remix OS Start Menu (button in left down corner, like in Windows). Click on it and login to your Google account and you will have fully functional Google Android for desktop!!
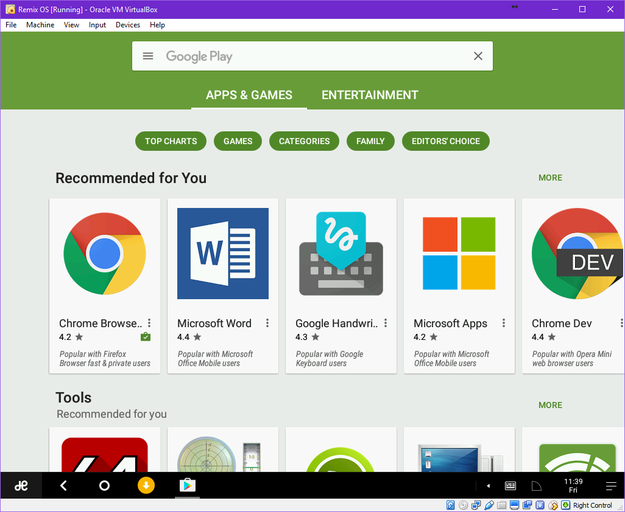
Google Play Store in Remix OS