
 Language
Related extensions:
![]() Expandability of Apple Mac laptop computers is very limited. In most cases you are able to upgrade only RAM memory modules and hard drive. However in past few years, the prices of very fast SSD (Solid State Drive) flash disk drives decreased to an acceptable level even for home users.
Expandability of Apple Mac laptop computers is very limited. In most cases you are able to upgrade only RAM memory modules and hard drive. However in past few years, the prices of very fast SSD (Solid State Drive) flash disk drives decreased to an acceptable level even for home users.
If you replace conventional hard drive with SSD flash drive, your Mac will be faster without upgrading of any other components.
Solid-state drive (SSD) is a data storage device that uses integrated circuit assemblies as memory to store data. SSD technology uses electronic interfaces compatible with traditional block input/output (I/O) hard disk drives. SSDs do not employ any moving mechanical components, which distinguishes them from conventional magnetic disks such as hard disk drives (HDDs) or floppy disks, which are electromechanical devices containing spinning disks and movable read/write heads. Compared with electromechanical disks, SSDs are typically less susceptible to physical shock, have lower access time and latency, are quiet and consume less energy.
Contents:
- Replace hard drive with SSD disk on MacBook Pro Late 2008 and Early 2009
- Replace hard drive with SSD disk on MacBook Pro Mid 2009 and later
- Mac OS X operating system installation
Requirements
At first you need to prepare a Mac OS X installation flash disk, or DVD and also backup your case sensitive data!
The instructions how to make installation USB/DVD are available in our articles
How to create Mac OS X Lion installation USB flash disk and
How to create Mac OS X Lion installation DVD.
We recommend that you install from flash disk, because it is much more faster than DVD.
Hard drive replacement in the MacBook Pro Late 2008 and Early 2009
Necessary tools:
- Phillips 00 Screwdriver
- T6 Torx Screwdriver
Place the MacBook Pro top-side down. Release latch to free battery access door.
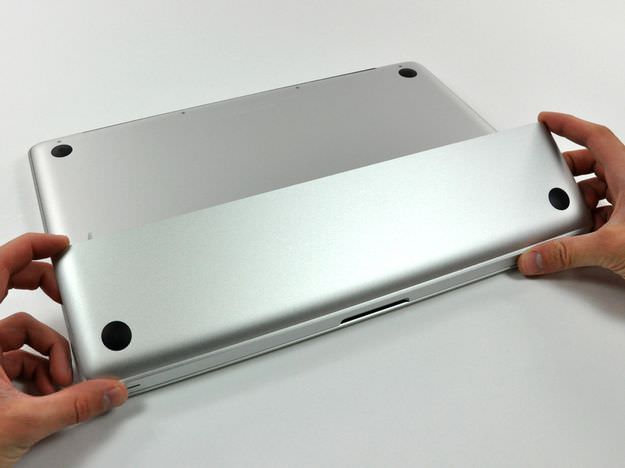
MacBook Pro Late 2008 and Early 2009 remove battery access door
Pull the battery up and out of the MacBook Pro.
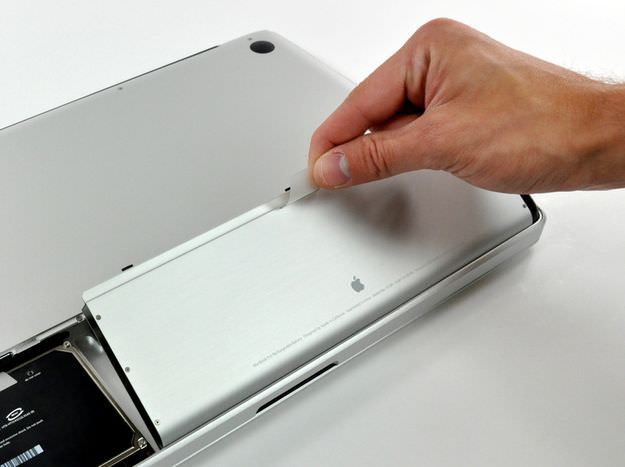
MacBook Pro Late 2008 and Early 2009 remove battery
Remove the single Phillips screw securing the hard drive bracket and and remove it.

MacBook Pro Late 2008 and Early 2009 remove HDD bracket
Remove the hard drive from its cable.
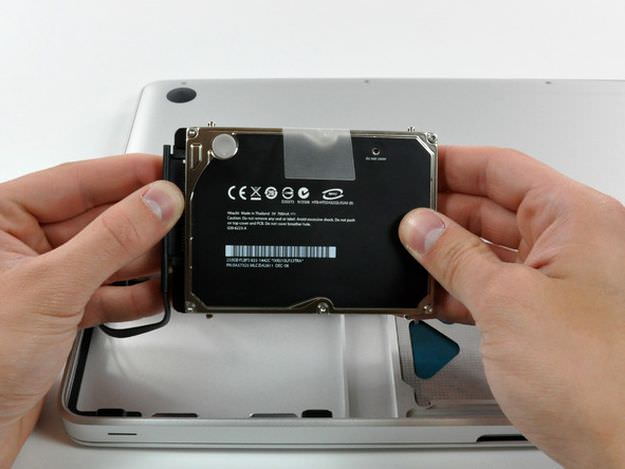
MacBook Pro Late 2008 and Early 2009 remove data cable
Remove two T6 Torx screws from both sides of the hard drive.
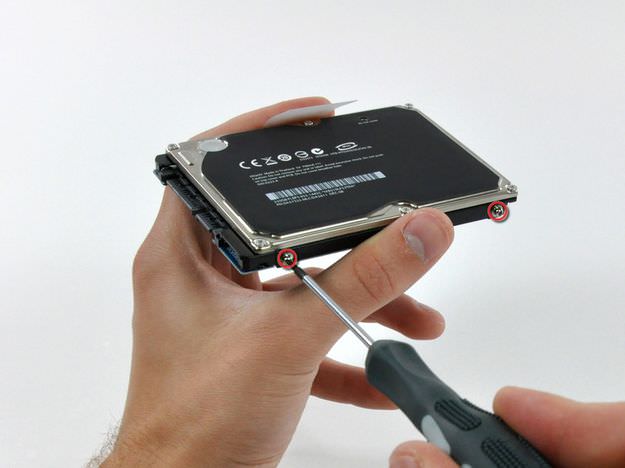
MacBook Pro Late 2008 and Early 2009 remove Torx screws
Now screw T6 Torx screws to SSD disk, connect data cable and place it to the MacBook Pro. Put back hard drive bracket and battery. Secure battery access doors with release latch.
Hard drive replacement for SSD disk in the MacBook Pro Mid 2009 and later
Necessary tools:
- Phillips 00 Screwdriver
- 5-Point Torx Plus Pentalobe screwdriver
On MacBook Pro Unibody Mid 2009 and later you need to remove entire lower case by removing 10 Phillips screws.
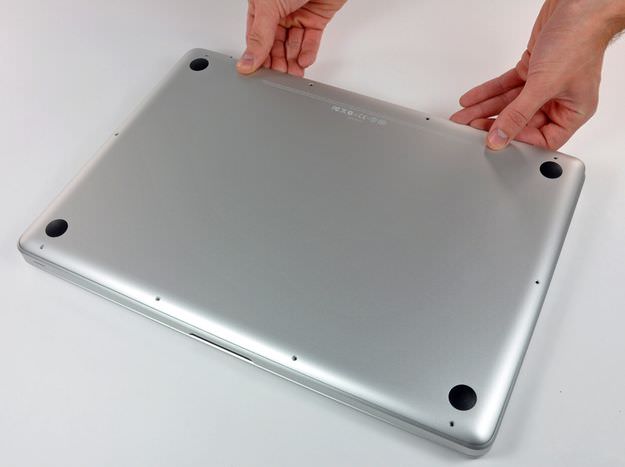
MacBook Pro Mid 2009 and later remove lower case
Unscrew three Pentalobe screws to release the battery.
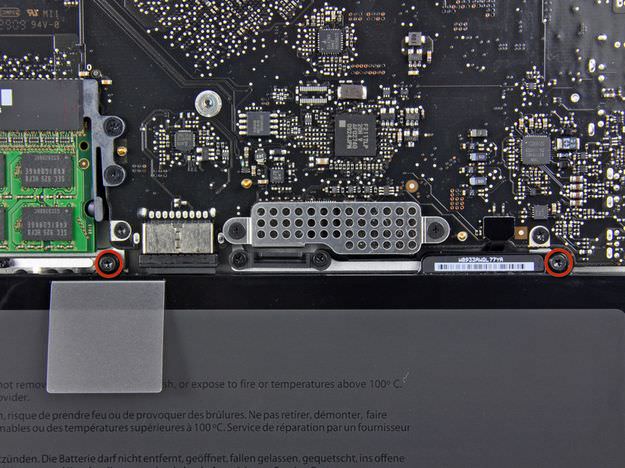
MacBook Pro Mid 2009 and later remove screws on battery
Lift the battery by its plastic pull tab.
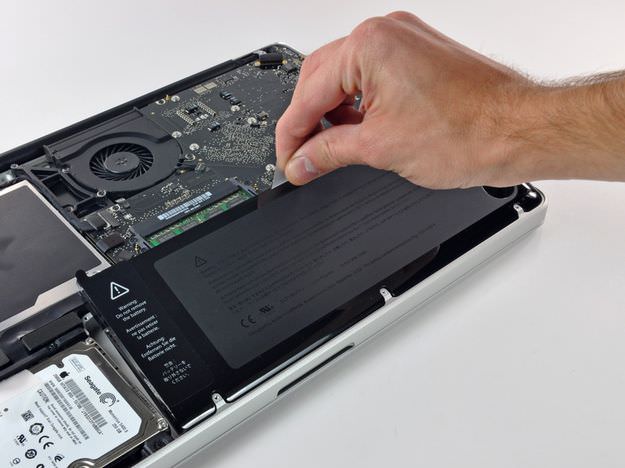
MacBook Pro Mid 2009 and later lift battery
Pull the battery cable connector away.
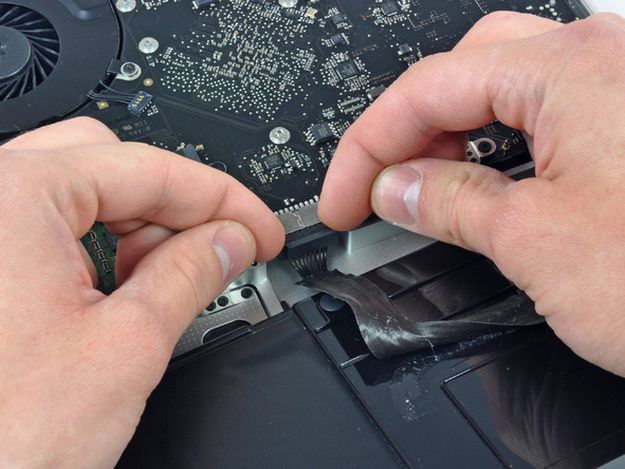
MacBook Pro Mid 2009 and later pull battery connector
Remove two Phillips screws securing the hard drive bracket.
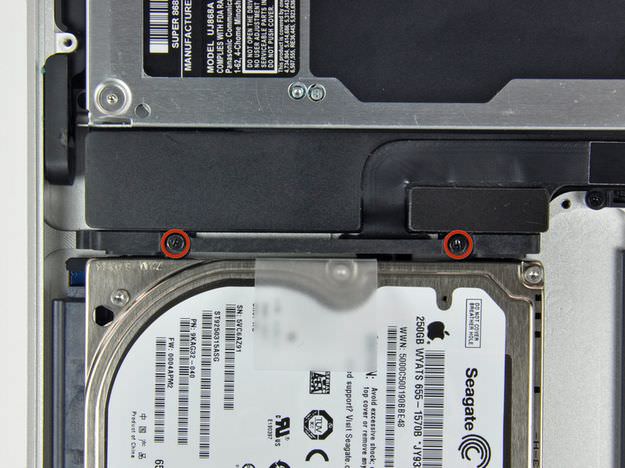
MacBook Pro Mid 2009 and later remove hard drive bracket
Lift the hard drive by its pull tab and remove data cable.
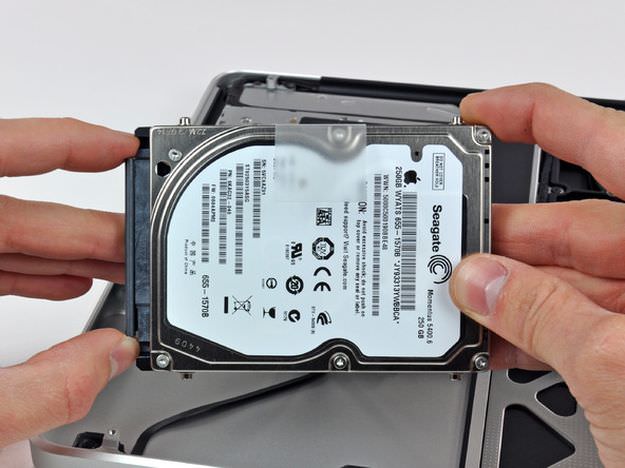
MacBook Pro Mid 2009 and later remove cable
Remove four T6 Torx screws from disk.
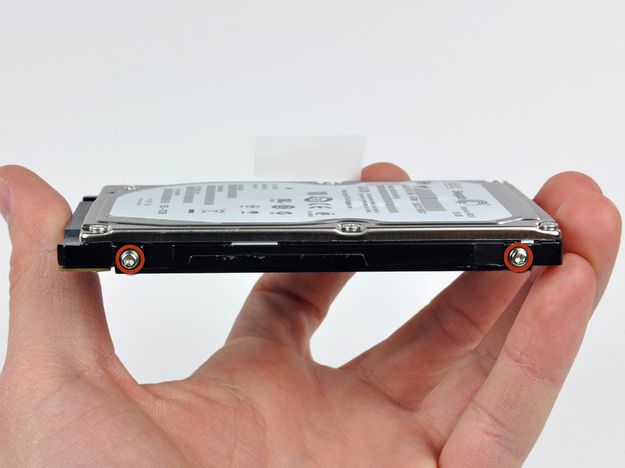
MacBook Pro Mid 2009 and later remove Torx screws
Now screw back T6 Torx screws to SSD disk, connect data cable and place it to the MacBook Pro. Place back hard drive bracket, battery and screw back lower case.
Images and some content is taken from iFixit.com website.
Mac OS X operating system installation
Connect your MacBook Pro to electric charger.
Put a flash disk to USB port.
Start the laptop and hold the Option (alt) key.
Select bootable source USB installation flash disk and wait until the OS X Utilities boot up.
The installation from DVD is the same as from USB flash drive. The only difference is to insert DVD installation medium to SuperDrive after you start the MacBook Pro and hold C button to force boot from CD/DVD drive.
If you created a Time Machine backup on an external hard drive, you can also restore the system from OS X Utilities by Restore from Time Machine Backup option.
You can also clone your old hard drive to a new SSD drive. Put the old hard drive to USB HDD rack, connect it to your Mac. Connect Mac OS X installation flash disk. Boot to OS X Utilities → Open Disk Utility → Restore tab → As a source set old hard drive in HDD rack and as a destination new installed SSD.
Click on Restore button. The detailed description is in our article Clone your Mac system disk to a new hard drive (SSD).
Keep in mind the source partition must be the same or smaller then destination.
Initialization of the SSD drive and installation of the new MAC OS X
At first you need to select Disk Utility app, because new disk must be initialized and formatted to Mac OS Extended file format.
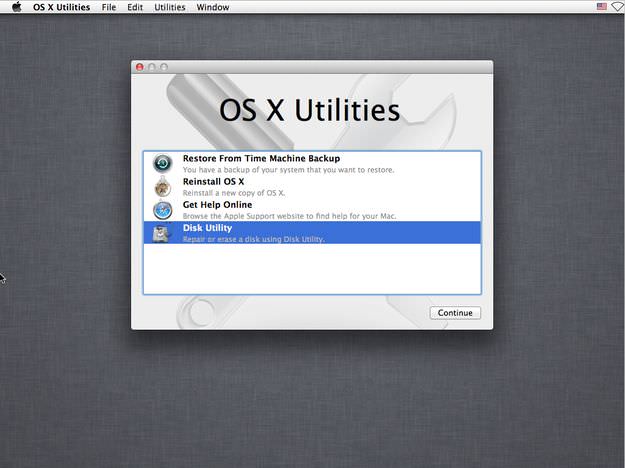
OS X Utilities main menu
If you don't do it, Mac OS X installator will not recognize new SSD disk and will refuse to install the system to your Mac.
Then in Disk Utility click on new SSD disk installed in your Mac and click on Erase tab. Set the Format to Mac OS Extended (Journaled) option. Set the name of the disk and click on Erase... button.
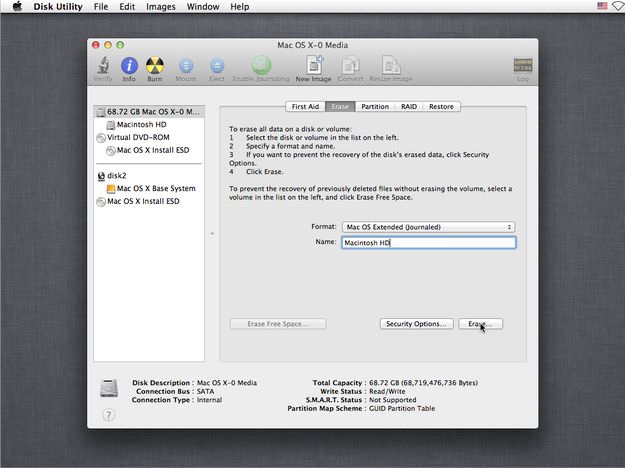
Disk Utility format the SSD disk settings
Click on Erase button and wait until the formatting will be finished.

Disk Utility format of SSD disk
Close the Disk Utility and select the Reinstall OS X option.
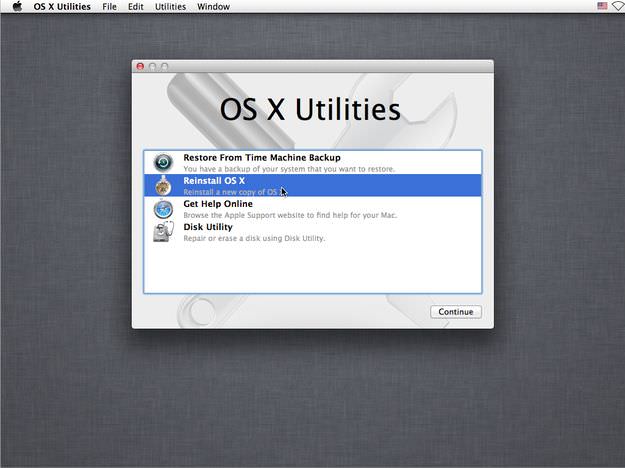
OS X Utilities Reinstall OS X option
Now you will go through Mac OS X wizard like installation process and you will be able to select your SSD disk as target drive for system.
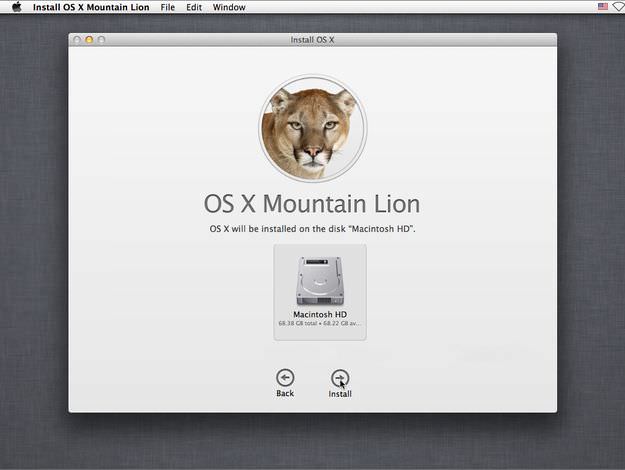
Mac OS X installation select the disk
If you replaced your hard drive with a non-Apple SSD disk, like OCZ, Kingston, Intel, Corsair etc. you will need to manually enable TRIM feature (command used to reduce SSD performance degradation) in Mac OS X. That is possible to do by utility called Trim Enabler.