
 Language
Related extensions:
![]() Since Windows Vista, there exists a supports for the installation from USB flash drives, which happens to be much more faster than the default installation from DVD disk. Unfortunately, Windows is able to create only one installation per USB drive.
Since Windows Vista, there exists a supports for the installation from USB flash drives, which happens to be much more faster than the default installation from DVD disk. Unfortunately, Windows is able to create only one installation per USB drive.
But there is a way how to create multiple Windows installations on one flash drive and we will show you how.
Another big advantage of our solution is that you don't need to copy Windows installation files from DVD disks to USB, but you use a ISO disk images of Windows installations.
How to prepare USB flash drive with Windows installations
Step 1 - Required software
At first, you will need to install utility called RMPrepUSB. It is available for free download at developers website and also download a WINISO_ImDisk_32a.zip archive from the same site.
Step 2 - Prepare Windows installation images
Create a working directory, in our case D:\Windows_Installations and create a subfolder D:\Windows_Installations\ISO. Now copy Windows ISO disk installation images that you want to store on flash drive to subfolder ISO.
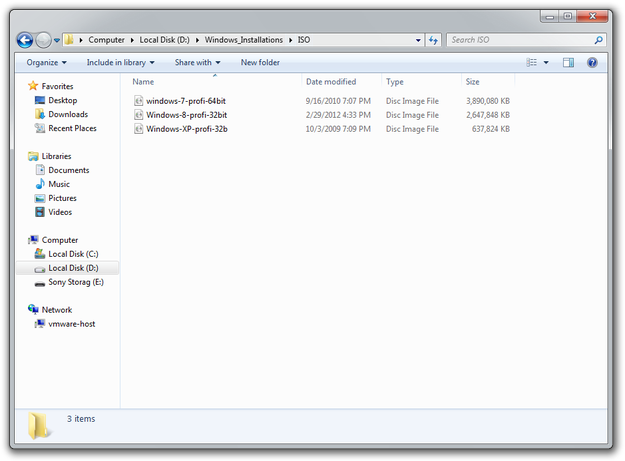
Prepare working folder with ISOs
If you have only installation DVDs of Microsoft Windows, you can use any software like MagicISO, PowerISO, AnyToISO, CDBurnerXP to create ISO disk image from them.
Step 3 - Prepare boot menu settings
Unpack content of WINISO_ImDisk_32a.zip archive downloaded in Step 1 to Windows_Installations folder. Open Menu.lst file in text editing application, like Windows Notepad, or Notepad++.
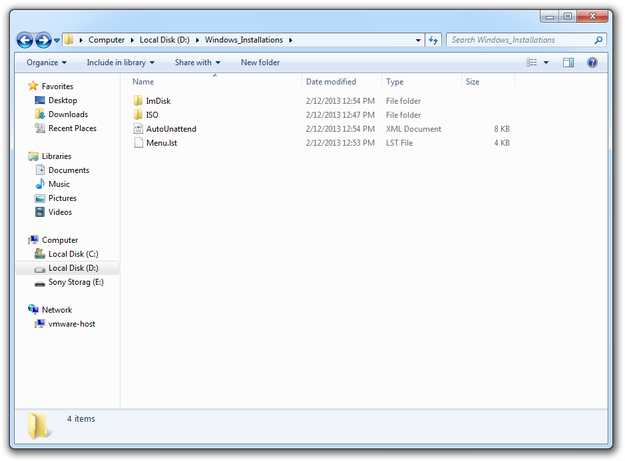
Copy content of WINISO_ImDisk_32a.zip archive
Delete all settings under #Universal Menu For All ISOs line.
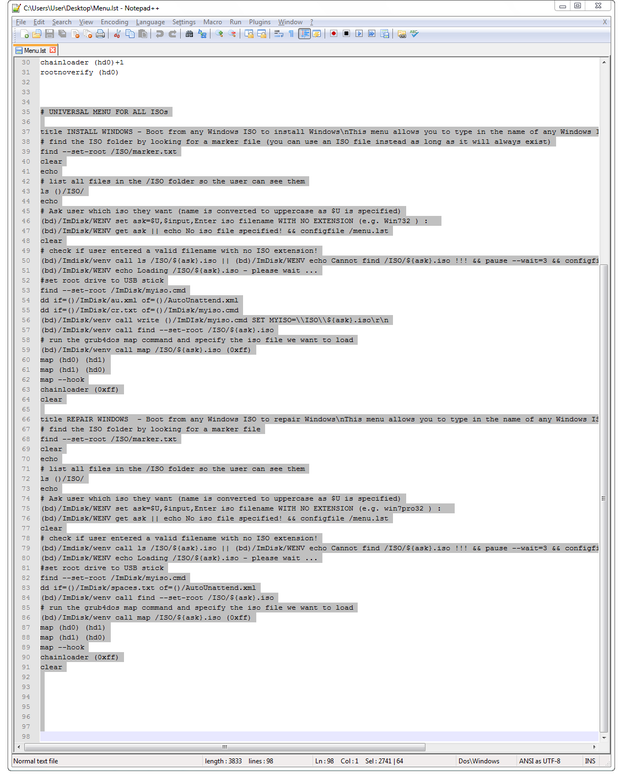
Edit menu.lst in Notepad ++ step 1
Mark two first sections, copy to clipboard (Ctrl+C) and paste them (Ctrl+V) under # --- ADD MORE MENUS FOR SPECIFIC ISO FILES HERE --- line exactly as many installation disk images you stored in D:\Windows_Installations\ISO folder, in our case 3 installation ISOs.
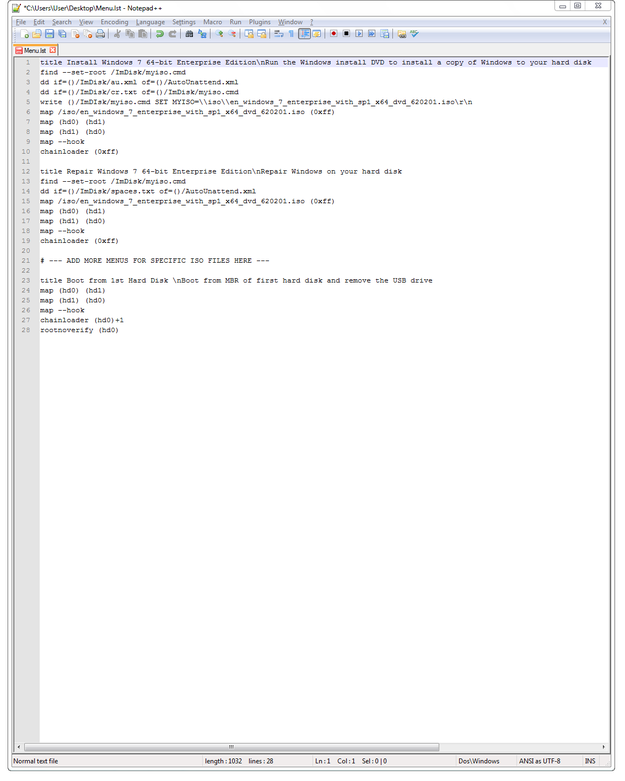
Edit menu.lst in Notepad ++ step 2
In lines title you can change the name of installations for example Install Windows 7, Repair Windows 8 etc.
In lines:
write ()/ImDIsk/myiso.cmd SET MYISO=\\iso\\
map /iso/
change the names of .iso archives that you stored in D:\Windows_Installations\ISO folder.
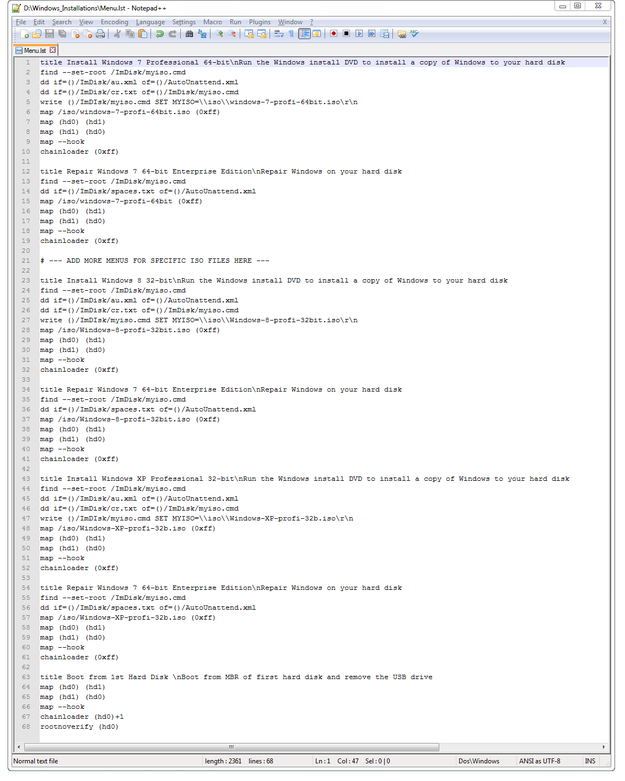
Edit menu.lst in Notepad ++ step 3
Step 4 - Prepare bootable flash drive
Insert flash drive to USB port and open RMPrepUSB utility that you downloaded in Step 1 with administrator rights (right click on RMPrepUSB and select Run as Administrator option).
Set the partition size and volume label.

RMPrepUSB utility prepare bootable flash drive step 1
Bootloader Options set to MS-DOS Bootable [IO.SYS].
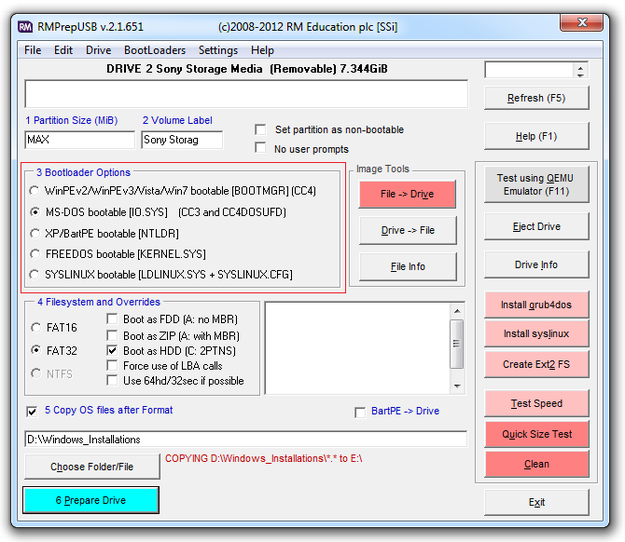
RMPrepUSB utility prepare bootable flash drive step 2
Filesystem and Overrides set to FAT32 and check the box Boot as HDD (C: 2PTNS)
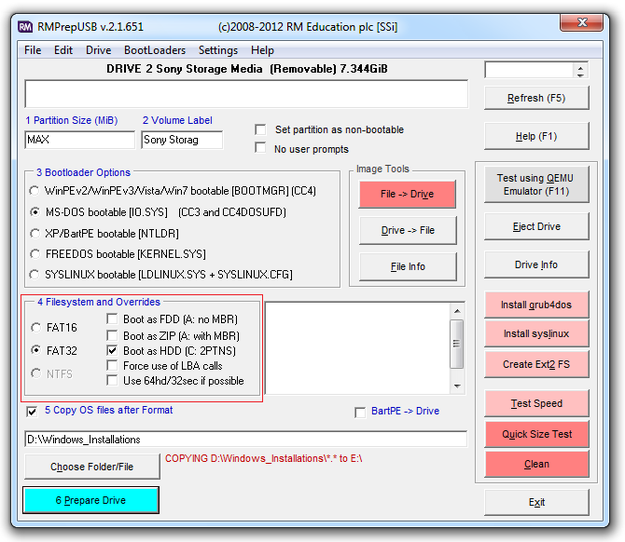
RMPrepUSB utility prepare bootable flash drive step 3
Check the box Copy OS files after Format. Click on Choose Folder/File button and select folder with installation data (in our case D:\Windows_Installations).
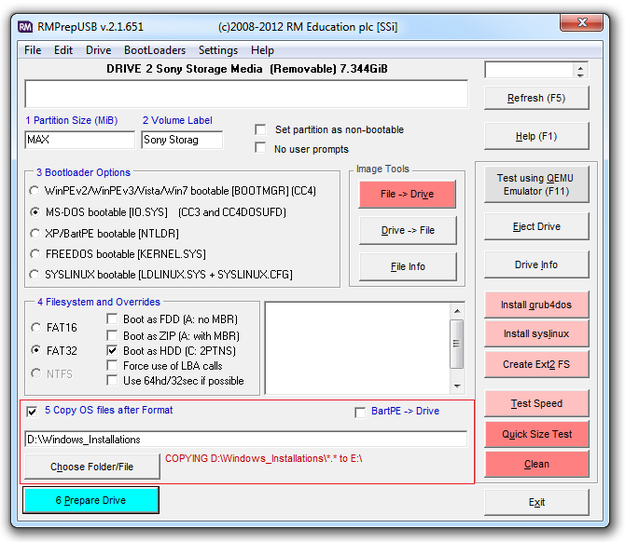
RMPrepUSB utility prepare bootable flash drive step 4
Click on 6 Prepare Drive button and wait until the RMPrepUSB utility prepared the flash drive and copy data to it.

RMPrepUSB utility prepare bootable flash drive step 5
After the preparation is finished, click on Install grub4dos button that will install a boot manager on the flash drive.

RMPrepUSB utility prepare bootable flash drive step 6
You can also try USB flash drive in QEMU emulator by press F11 button, or click on Test using QEMU Emulator (F11) button.
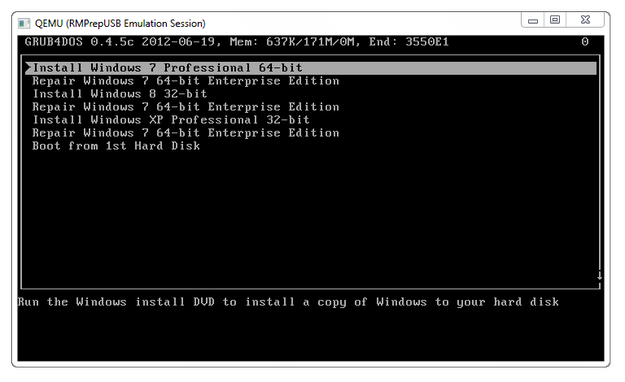
QEMU emulator
And that's it! You have a bootable flash drive with multiple Windows installations. Now you can insert the flash drive to another computer, set the Boot from USB storage in the BIOS/UEFI settings and install selected operating system.