
 Language
Related extensions:
TIP: VirtualDub video software
There is plenty of programs for editing of video files. Yet none of them can match the efficiency combined with simplicity of VirtualDub, a popular software used by many users for more than 15 years already. Our overview will show your how to easily edit, repair, split or merge your video files with this application.
About VirtualDub
The program was originally created by Avery Lee, who wanted to comfortably edit his favorite series. Because of its simplicity and because of all functions are accessible through menus in main toolbar, it started to quickly spread between common users, who didn't have time to learn how to use professional programs.
You can download the program through its main page, which links you to its Sourceforge location, where you can choose between a 32bit or 64bit version and download it for free. The program itself doesn't require installation and you can use it just after the extraction from the downloaded archive. But you should probably put it in its own folder, where you can easily find and access it.
VirtualDub features
Video files
VirtualDub can work with many video formats and also with animated pictures or image sequences. The following video file types can be opened and edited with VirtualDub: AVI, DIVX, MPG, MPEG, MPV, M1V, DAT, ANIM, FLM, and VDR.
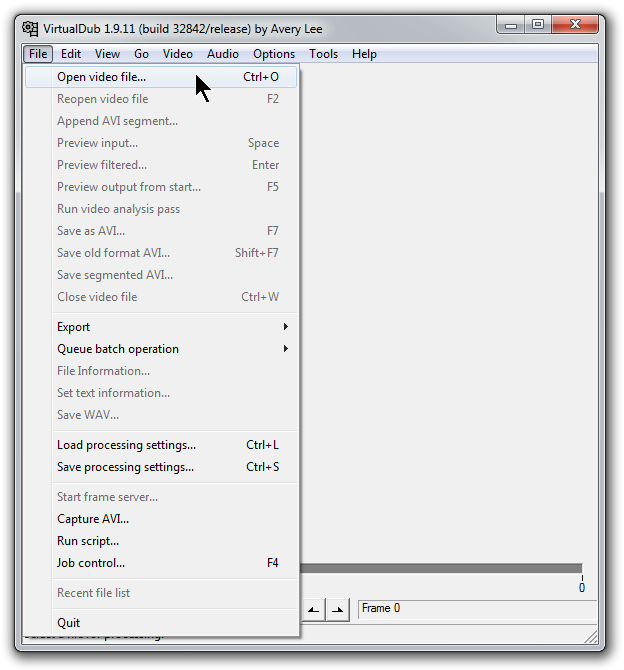
Opening video files in VirtualDub. Click on the screenshot to enlarge it.
Video Saving
VirtualDub has some specifics in regards to the way it is saving video files. In the Video menu on the toolbar you can find several options as how to deal with the video, namely, Direct stream copy, Fast recompress, Normal recompress and Full processing mode. These options cover different depth of video processing during its saving. If you do not want to change video compressing, make sure the Direct stream copy option is selected.
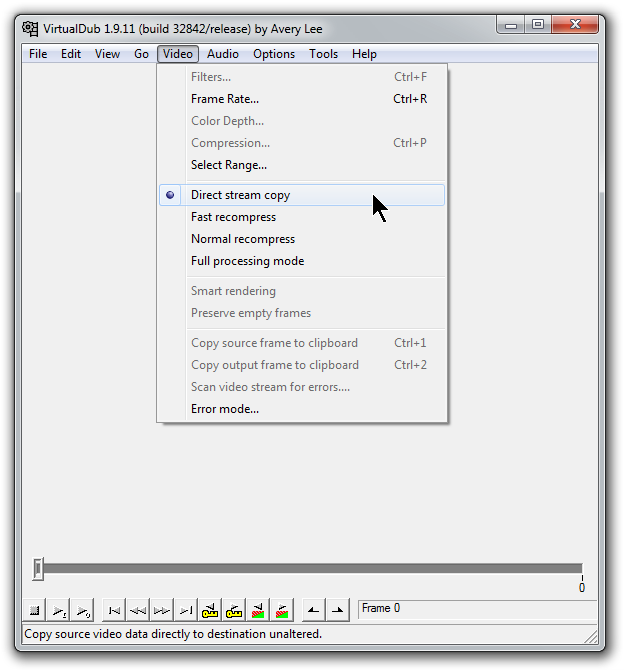
Choosing the desired saving method in VirtualDub. Click on the screenshot to enlarge it.
Video Editing
How many times did one bad movie shot ruin the whole atmosphere of your home video? With VirtualDub you can simply remove it from the video.
First open the video file with the File → Open video file option. Then click on Edit → Set selection start to mark the the beginning of the part you wish to delete and after click on Edit → Set selection end to finish the selection. After that just press the delete key on your keyboard to remove the selected part.
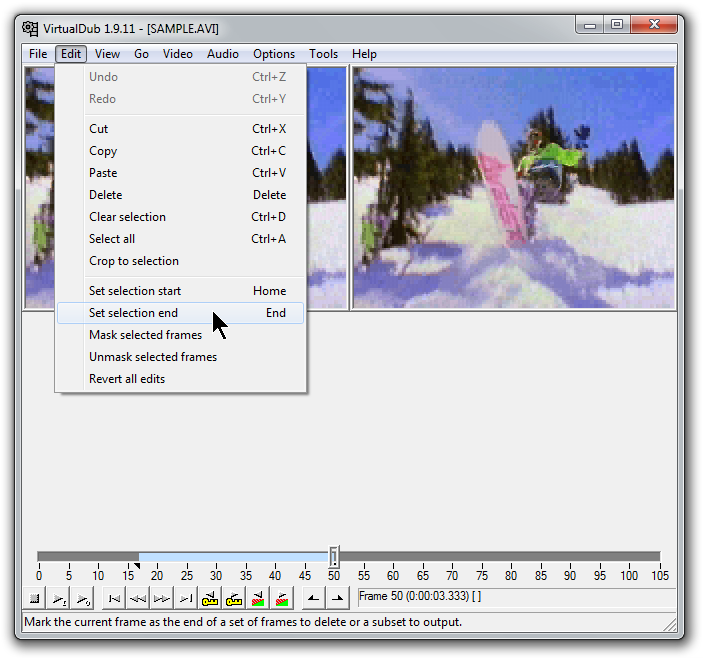
Selecting the part of the movie for video editing. Click on the screenshot to enlarge it.
Masking of bad frames
VirtualDub also has very useful tool for analyzing of bad frames. Such frames usually cause poor visual quality and other visual errors. You can start the analyze by selecting Video → Scan video stream for errors function function.
The best way to deal with bad frames is to mask them, which means that you prolong the duration of previous good frame instead the bad one. You can mask frames by using the Edit → Mask selected frames option.
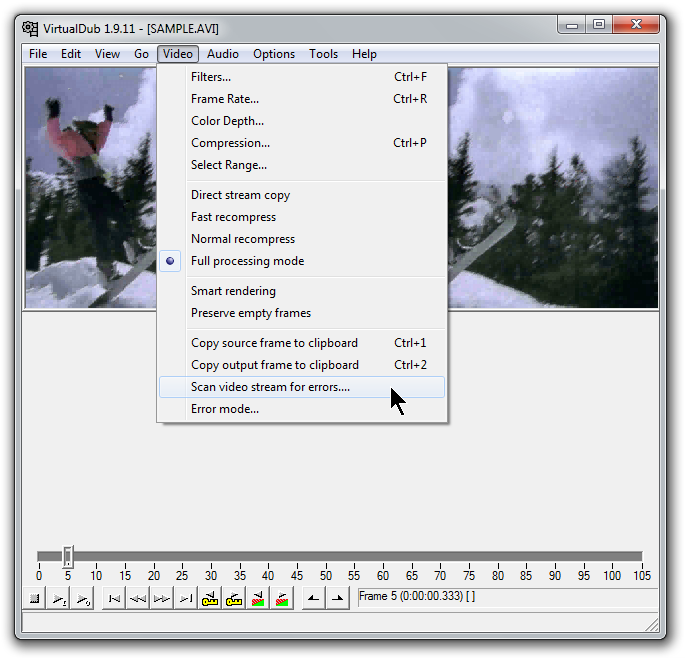
Analyzing the video for errors and bad frames in VirtualDub. Click on the screenshot to enlarge it.
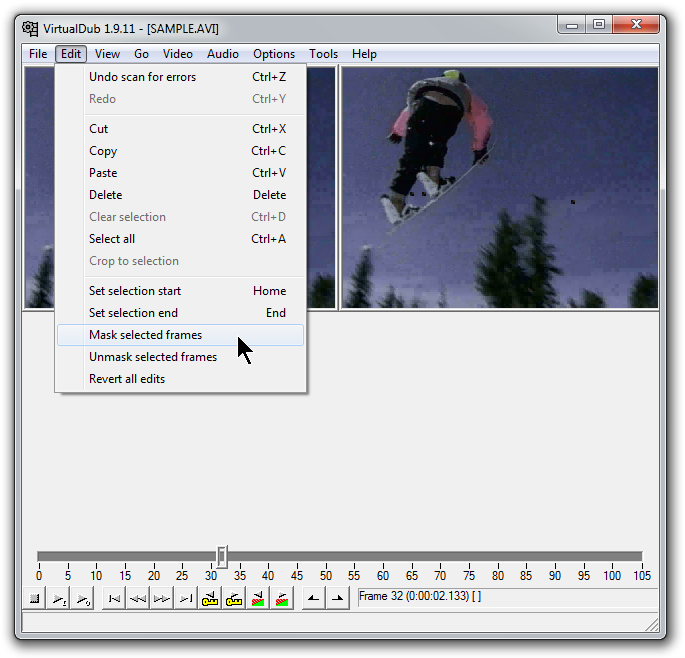
Masking selected bad frames in VirtualDub. Click on the screenshot to enlarge it.
Merging two videos together
A lot of people have many old videos on their CDs, which are split to about 700 MB. With VirtualDub users can merge those parts to one single file. Open the first part of your movie and then use the File → Append AVI segment function to choose more parts. Be advised, that you can only merge files with same audio and video format.
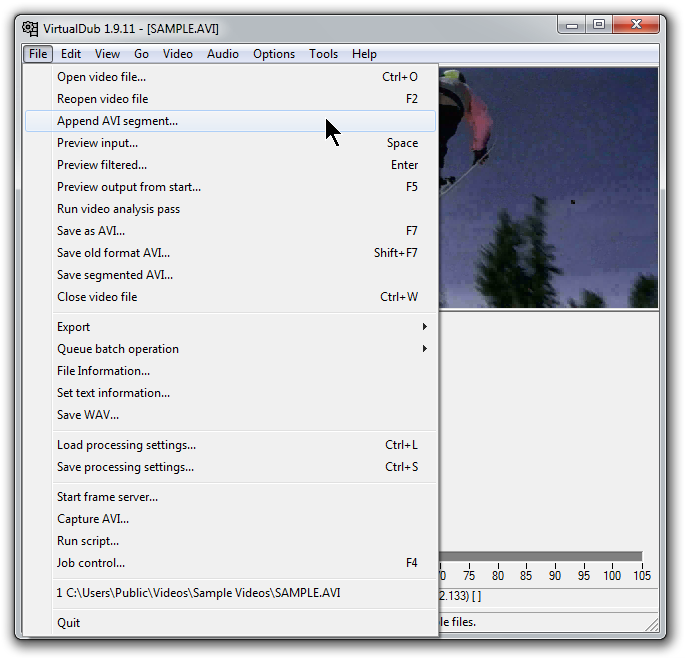
Merging to videos together in VirtualDub. Click on the screenshot to enlarge it.
Spiting movies into more parts
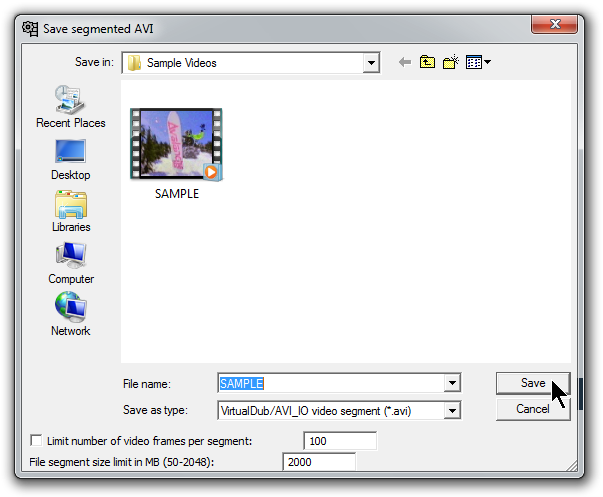
if your video file is too big for your purposes, you can also easily split it in two or more pieces. First open your video file and then from the File menu select the Save segmented AVI option. A new window will appear and in its bottom a selection you can select the maximum size, or the number of frames each part of the split movie should have. The Save button will confirm your selection and split the movie.
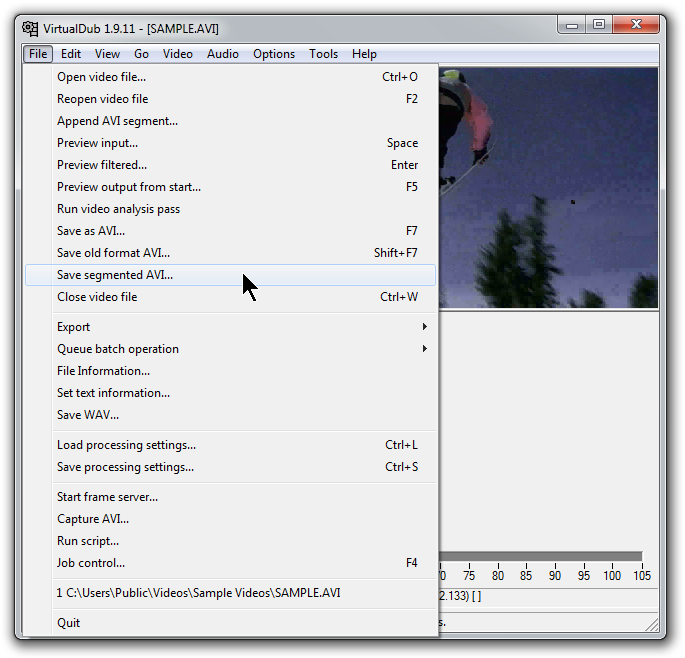
Saving segmented AVI parts in VirtualDub. Click on the screenshot to enlarge it.
Extra Tip: If you forget to check the Direct stream copy option before saving your video, it will start to save it fully uncompressed and the final file will be much greater than the original. If you do not want to wait till the process is completed, you can abort it with the File → Abort dub function.